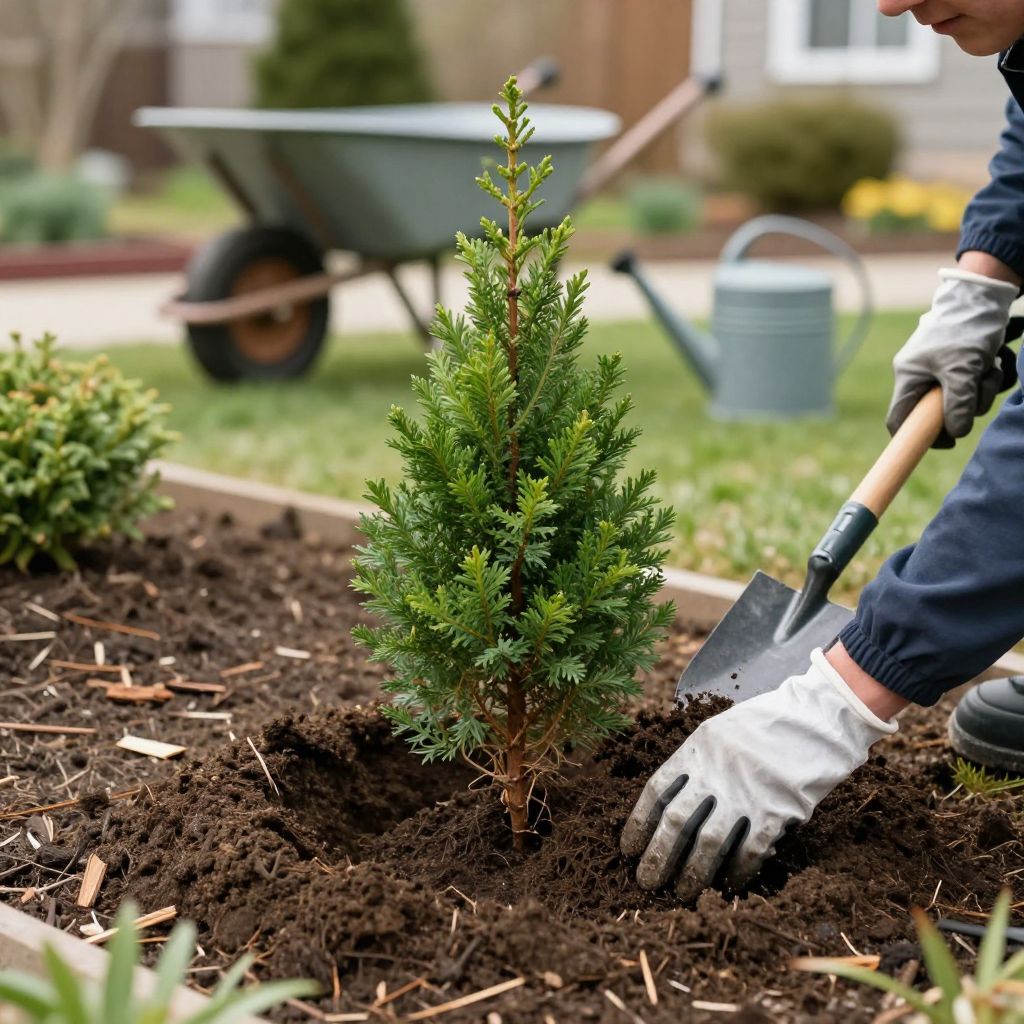
Wondering when to plant arborvitae so they settle in quickly and grow into a healthy screen or hedge? Timing matters because these evergreens root best when conditions are mild and the soil stays workable. Planting at the right time reduces transplant shock and gives the roots a strong start before summer heat or winter cold arrive.
The best planting window is usually early fall or spring, depending on your climate. The goal is to avoid extreme heat, frozen ground, and prolonged drought, while giving the plant enough time to establish roots before stress hits.
When to plant arborvitae?
Plant arborvitae in early fall in many regions, or in spring after the soil has warmed and before hot weather arrives. Fall is often ideal because cooler air and warm soil encourage root growth with less top growth stress. In colder climates, spring planting is safer; in mild climates, fall is often best.
Why timing matters for arborvitae
Arborvitae are evergreen conifers, often planted as privacy screens, hedges, or foundation accents. They can look tough above ground, but newly planted roots are vulnerable to heat, drought, and frozen soil.
When you plant at the right time, the tree can focus on root establishment instead of fighting weather stress. That usually means better growth, fewer brown patches, and a stronger plant heading into its first summer or winter.
Best seasons by climate
- Cooler climates: Spring is often the safest choice, once the soil is workable and the risk of hard freezes has passed.
- Mild climates: Early fall is excellent because roots can grow through autumn and winter without intense heat.
- Hot, dry regions: Plant in fall if possible, and avoid late spring or summer planting unless you can water carefully through establishment.
- Cold-winter regions: Avoid planting too late in fall, because roots need time to settle before the ground freezes.
How to choose the right planting time
Instead of relying only on the calendar, use your local weather and soil conditions. Arborvitae do best when the soil is moist, not soggy, and temperatures are moderate.
- Wait until the soil is no longer frozen and can be dug easily.
- Avoid planting during a heat wave or during a dry spell if you cannot water consistently.
- Choose a time when the plant has several weeks, ideally more, to establish roots before extreme weather.
- If you are unsure, ask your local extension service or garden center about the best planting window in your area.
Container-grown vs. balled-and-burlapped arborvitae
Container-grown arborvitae can usually be planted over a wider window because the root ball stays intact. Even so, they still establish best in mild weather. Balled-and-burlapped plants are more sensitive to transplant shock, so timing and careful watering matter even more.
Where arborvitae grow best
Good site selection is just as important as timing. Arborvitae are commonly used for hedges and screens, but they need the right light, soil, and spacing to stay dense and healthy.
Light
Most arborvitae grow best in full sun to light shade. Too much shade can cause thinning and weak growth, especially in lower branches. In hotter climates, a little afternoon shade can help reduce stress on newly planted shrubs.
Soil and drainage
They prefer soil that drains well but still holds some moisture. Constantly wet ground can lead to root problems, while very dry, sandy soil can stress young plants unless you water carefully.
If your soil is heavy clay, improve the planting area with organic matter and make sure water does not pool around the roots. If drainage is poor, consider planting on a slight mound rather than in a low spot.
Spacing
For a hedge or privacy screen, space arborvitae according to their mature width, not their current size. Crowding them too closely can create disease and thinning problems later. If you want a dense screen, you still need enough room for air movement and healthy growth.
How to plant arborvitae step by step
Planting correctly helps arborvitae establish faster and reduces transplant stress. Take your time with the hole, root ball, and watering.
- Water the plant first. A well-watered root ball is easier to plant and less likely to dry out.
- Dig a wide hole. Make the hole about 2 to 3 times as wide as the root ball, but no deeper than the root ball’s height.
- Check the root flare. The top of the root flare should sit at or slightly above soil level. Do not bury the trunk.
- Loosen circling roots. If the plant is container-grown and roots are circling, gently tease them apart so they grow outward.
- Backfill with native soil. Use the soil you removed, breaking up clumps and removing large rocks. Avoid creating a “pot” of rich compost in the hole.
- Water deeply. Soak the root zone thoroughly after planting to settle the soil and remove air pockets.
- Mulch lightly. Apply 2 to 3 inches of mulch around the base, keeping it a few inches away from the trunk.
Should you add compost?
A small amount of compost can help poor soil, but don’t overdo it. Too much amendment in the planting hole can create a water-holding pocket that discourages roots from spreading into surrounding soil. A better approach is to improve the entire planting area if needed, not just the hole.
Watering after planting
Newly planted arborvitae need consistent moisture while roots spread into the surrounding soil. The goal is evenly moist soil, not constant saturation.
Check the soil with your finger a few inches down. If it feels dry, water deeply. If it feels wet or muddy, wait before watering again. In warm weather, new plantings may need closer attention than established shrubs.
Common watering mistakes
- Underwatering: The most common cause of transplant stress is letting the root ball dry out.
- Overwatering: Soggy soil can suffocate roots and encourage rot.
- Shallow watering: Light sprinkling only wets the surface and does not help roots establish deeply.
- Ignoring weather changes: Rainy periods, cool spells, and hot winds all affect how quickly soil dries.
Pruning and shaping newly planted arborvitae
Arborvitae usually need very little pruning right after planting. Focus on establishment first. If you must remove broken or dead branches, do so cleanly with sharp pruners.
Avoid heavy pruning into old brown wood, because many arborvitae do not resprout well from bare, leafless stems. For hedges, light shaping is best once the plant is settled and actively growing.
When to prune
Light pruning is usually safest in late spring or early summer, after the plant has begun active growth. Avoid major pruning late in the season if your area gets early frost, because tender new growth may be damaged.
Fertilizing and soil care
New arborvitae do not usually need strong fertilizer at planting time. In many cases, good soil preparation and mulch are enough for the first season.
If growth is weak later, a soil test is the best way to decide whether fertilizer is needed. Overfertilizing can push soft growth that is more vulnerable to drought, winter damage, and pests.
Mulch benefits
Mulch helps conserve moisture, moderate soil temperature, and reduce weeds around the root zone. Keep mulch flat and even, and avoid piling it against the trunk, which can trap moisture and invite rot.
Common problems after planting
Even when planted at the right time, arborvitae can show stress during the first year. Early troubleshooting can save the plant.
Browning needles
Some browning on the inside of the plant can be normal, especially in older interior growth. But widespread browning on the outer tips often points to drought stress, root problems, winter burn, or transplant shock.
Winter burn
In cold, windy climates, evergreen foliage can lose moisture faster than roots can replace it. Fall-planted arborvitae may need extra watering before the ground freezes, especially if autumn is dry.
Root rot and poor drainage
If the soil stays wet for long periods, roots may decline. Symptoms can include yellowing, browning, and weak growth. The best fix is improving drainage and avoiding overwatering, not simply adding more fertilizer.
Pests and diseases
Arborvitae can sometimes face bagworms, spider mites, or foliar blights. Healthy spacing, good airflow, and proper watering help reduce problems. Inspect plants regularly, especially during hot, dry weather or after periods of stress.
How long does it take arborvitae to establish?
Most arborvitae need at least one full growing season to settle in, and larger plants may take longer. You may see some new growth sooner, but root establishment is the real milestone.
During the first year, focus on steady moisture, weed control, and protecting the root zone from mowing or foot traffic. Once established, arborvitae are generally easier to maintain.
Can you plant arborvitae in summer?
Yes, but it is usually the hardest time to plant them. Summer planting can work if you can provide reliable watering and the weather is not extreme, but the risk of stress is much higher.
If summer is your only option, choose a cloudy day, plant in the early morning or late afternoon, mulch well, and monitor moisture closely. In hot climates, it is often better to wait for fall.
Quick planting checklist
- Choose spring or early fall for most locations.
- Plant when temperatures are mild and the soil is workable.
- Use well-drained soil and avoid low, soggy spots.
- Dig wide, not deep.
- Keep the root flare at soil level.
- Water deeply after planting and during dry spells.
- Mulch, but keep mulch away from the trunk.
- Avoid heavy pruning and heavy fertilizer at planting time.
Conclusion
If you’re deciding when to plant arborvitae, aim for early fall in mild regions or spring in colder ones, then match your timing to your local weather and soil conditions. Give the roots a good start, keep the soil evenly moist, and your arborvitae will be far better prepared to grow into a healthy screen or landscape anchor.
For more practical planting guidance, you may also find helpful reading on how to plant evergreens and mulching garden shrubs correctly.