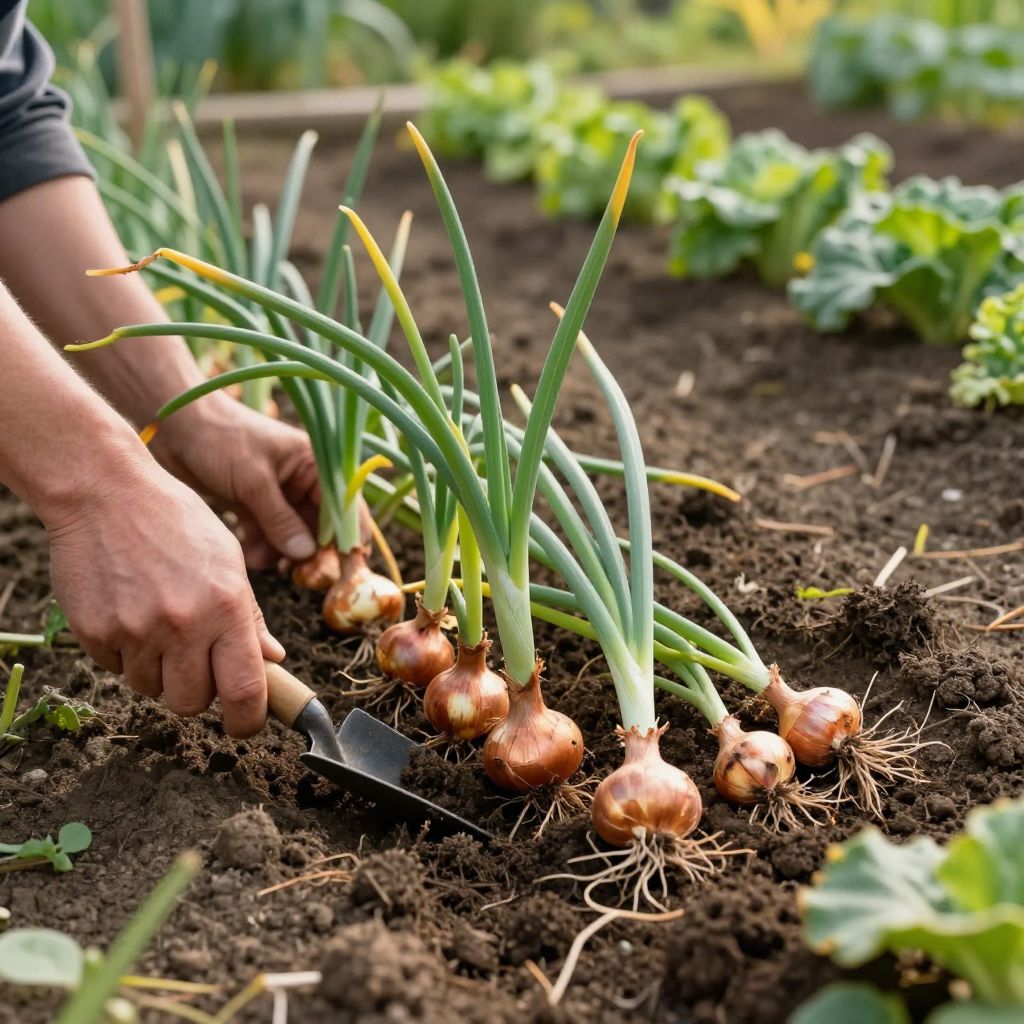
Wondering when to harvest shallots so they store well and taste their best? The right timing matters: harvest too early and the bulbs may be undersized or soft; wait too long and they can split, sprout, or lose quality in the ground.
Shallots are usually ready when the tops begin to yellow, flop over, and dry down naturally. The exact timing depends on your climate, planting time, and growing conditions, so the best approach is to watch the plants closely rather than follow a fixed calendar date.
When to harvest shallots?
Harvest shallots when most of the tops have turned yellow or brown and fallen over, and the necks feel soft and beginning to dry. For many gardeners, this happens about 90 to 120 days after planting, but maturity can vary with variety, weather, and soil fertility.
How to tell shallots are ready to dig
Shallots give several clear signs that they are approaching harvest. The most reliable cue is the tops, not the calendar.
Look for these maturity signs
- Foliage yellowing: The green leaves start fading to pale yellow.
- Top fall-over: The leaves bend and collapse naturally.
- Necks soften: The stem just above the bulb feels less rigid.
- Outer skins begin to dry: The bulb starts forming papery layers.
- Bulbs feel firm: They should be well-shaped and solid when gently checked.
If only a few leaves are yellowing while the rest are still green and upright, the shallots usually need more time. If most of the tops have died back and the bulbs are full-sized, it is usually time to lift them.
What if the tops fall over early?
Sometimes shallot foliage collapses before the bulbs are fully mature because of wind, heavy rain, or disease. If the bulbs still feel small and the necks are thick and green, leave them in the ground a bit longer if possible. If rot or pest damage is spreading, harvest sooner and cure carefully.
Should you harvest shallots all at once or in stages?
You can harvest shallots in stages if you want some for immediate use, but for storage, it is best to harvest the crop when most bulbs have matured. Pulling a few early is fine, especially if you need fresh shallots for the kitchen, but those bulbs will not store as long as fully cured ones.
Staggered harvesting works well when:
- You planted a mixed crop and some bulbs mature earlier than others.
- You want tender, fresh shallots for short-term use.
- Weather is turning wet and you want to reduce the risk of rot.
For the best storage quality, aim to harvest the main crop when around two-thirds to three-quarters of the tops have fallen. That usually gives a good balance between bulb size and keeping quality.
How to harvest shallots without damaging them
Shallots bruise easily, and damaged bulbs are more likely to rot in storage. Use a gentle lifting method rather than yanking them from the soil.
- Choose a dry day if possible, after the soil has had time to drain.
- Loosen the soil beside the row with a garden fork or trowel.
- Lift the bulbs carefully from beneath, avoiding cuts and punctures.
- Shake off loose soil, but do not wash the bulbs if you plan to store them.
- Lay them in a single layer in a shaded, airy spot to begin drying.
If the soil is compacted, work slowly so you do not snap the necks or slice into the bulbs. A damaged shallot may still be usable, but it should be eaten first rather than stored long term.
Best tools for harvesting
- Garden fork for loosening soil in beds
- Hand trowel for small plantings or raised beds
- Gloves to protect your hands from dry soil and sharp edges
- Crates, mesh trays, or slatted racks for curing
What affects the timing of harvest?
Several growing conditions can make shallots mature earlier or later than expected. If you understand these factors, you can judge readiness more accurately in your own garden.
Climate and season
Cooler springs and summers often slow growth, while warm, steady weather speeds it up. In wetter regions, bulbs may mature a little later and need extra care to avoid rot. In hot, dry climates, tops may dry down faster, but bulbs still need time to size up fully.
Soil and drainage
Shallots prefer loose, fertile soil with good drainage. Heavy, waterlogged soil can delay maturity and increase disease pressure. If your ground stays wet after rain, harvest promptly once the bulbs are ready rather than leaving them in soggy soil.
Watering patterns
Consistent moisture during active growth helps bulbs size up, but too much water near harvest can slow skin formation and shorten storage life. As the tops begin to yellow, reduce watering if conditions allow so the bulbs can dry down naturally.
Fertility and compost
Rich soil supports good growth, but excessive nitrogen can produce lush tops and delay bulb maturity. If you use compost, work it into the bed before planting rather than feeding heavily late in the season. Balanced growth usually leads to better harvest timing and firmer bulbs.
How to cure shallots after harvest
Curing is the step that makes shallots store well. Freshly lifted bulbs need time in a dry, airy place so the skins tighten and the necks seal.
Curing steps
- Spread the shallots in a single layer or hang them in loose bunches.
- Keep them out of direct sun, which can scorch the bulbs.
- Provide good airflow with a fan, open shed, porch, or covered frame.
- Leave them until the necks are fully dry and the outer skins are papery.
Depending on humidity and temperature, curing can take one to several weeks. The bulbs are ready for storage when the necks are tight and dry, the skins rustle, and the roots are shriveled.
Signs curing is complete
- Necks are dry and closed
- Outer skins are papery and protective
- Roots are dry and brittle
- Bulbs feel firm and no longer damp
Common mistakes when harvesting shallots
A few simple mistakes can reduce storage life or spoil part of the crop. Avoiding them is one of the easiest ways to get better results.
Don’t harvest too early
Undersized bulbs may taste fine fresh, but they usually store poorly. If the tops are still mostly green and upright, give the crop more time unless weather or disease forces an early lift.
Don’t leave them in wet soil too long
Once the bulbs are mature, prolonged wet conditions can encourage rot and skin problems. If heavy rain is forecast and the crop is ready, harvest before the soil becomes saturated.
Don’t wash bulbs for storage
Moisture trapped around the necks or skins can lead to mold. Brush off soil gently instead, and save washing for shallots you plan to use soon.
Don’t cure in full sun
Strong sun can bleach or scorch the outer layers. Shade and airflow are much better for preserving quality.
How to store harvested shallots
Once cured, store shallots in a cool, dry, well-ventilated place. Mesh bags, shallow crates, or braided bunches all work if air can circulate around the bulbs.
Storage tips
- Keep bulbs dry and separate from damp produce.
- Check regularly for soft spots or sprouting.
- Use damaged bulbs first.
- Avoid sealed plastic bags, which trap moisture.
Good storage conditions help shallots last much longer, but exact keeping time depends on the variety and how well they were cured. If any bulbs feel soft, show mold, or begin sprouting, use them promptly.
Can you harvest shallots for green tops?
Yes. If you want mild, onion-like greens, you can harvest a few young shallots before bulb formation is complete. Just know that removing too many leaves can reduce bulb size, so it is better to thin lightly and leave the rest to mature if your goal is a full harvest.
Quick harvest checklist
- Most tops have yellowed and fallen over
- Necks feel soft and dry down
- Bulbs are firm and well formed
- Soil is dry enough to lift cleanly
- You have a shaded, airy place to cure them
If you are unsure, dig one test bulb first. A single sample can tell you a lot about bulb size, skin development, and whether the rest of the crop needs a few more days or weeks.
Final thoughts
The best time to harvest shallots is when the tops have naturally yellowed and fallen, the bulbs feel firm, and the necks are beginning to dry. Watch your plants closely, lift them gently, and cure them well so you get the best flavor and storage life.
For more practical bulb-crop guidance, you may also find it helpful to read about growing and caring for shallots and other vegetable garden basics.