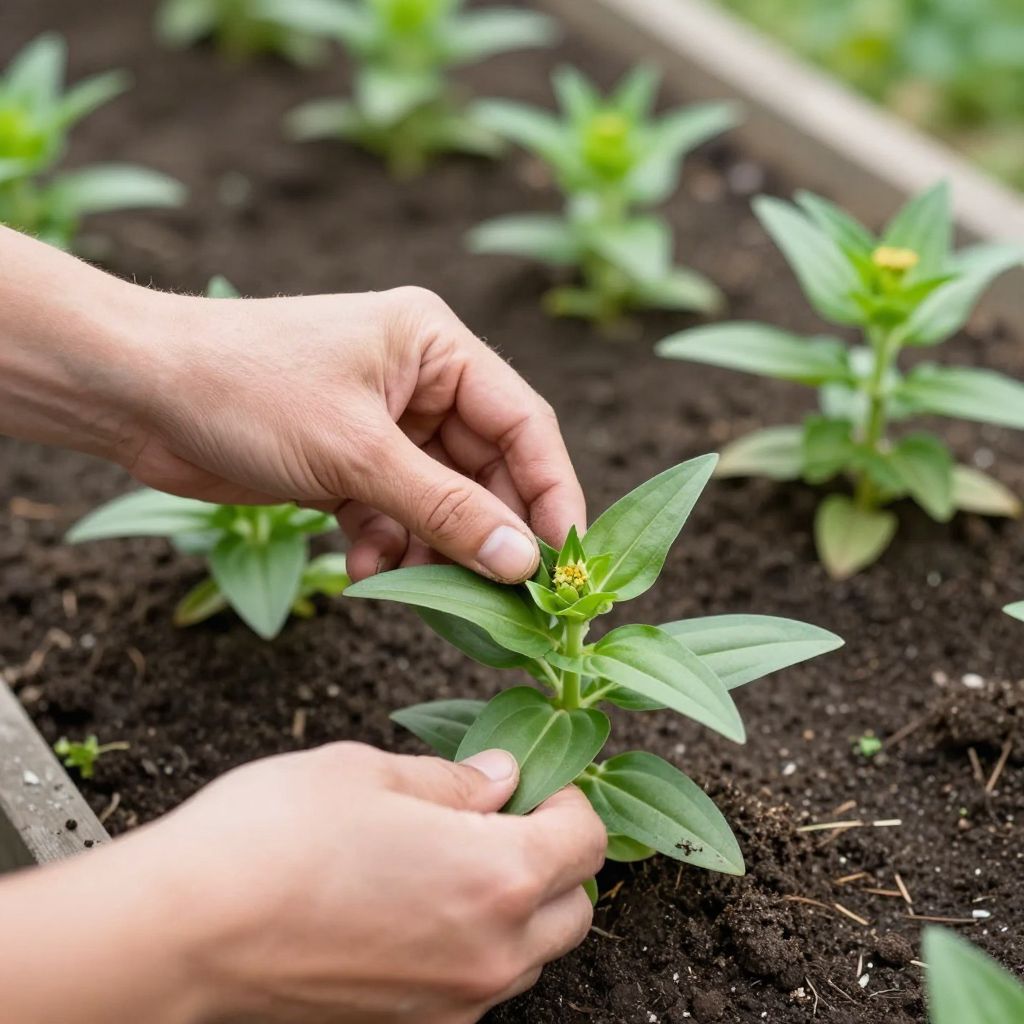
Wondering when to pinch zinnias so they grow bushier and bloom better? The right timing matters: pinch too early and you may slow the plant down; pinch too late and you lose the main benefit. With a little timing and a clean cut, you can encourage sturdier stems, more branching, and a fuller display.
Zinnias are easy annuals, but they respond best when you pinch them at the right stage of growth. Here’s how to tell when to pinch, how to do it, and when to leave the plant alone so you still get plenty of flowers.
When to pinch zinnias?
Pinch zinnias once the seedling has 3 to 4 sets of true leaves and is growing strongly, usually when it is about 6 to 12 inches tall. Remove the soft growing tip just above a leaf node to encourage side shoots. If your goal is tall single stems for cutting, you may skip pinching or pinch only once.
Why pinching zinnias helps
Pinching removes the main growing tip, which tells the plant to branch from lower nodes. That usually means more stems, a bushier shape, and more blooms over time. It can also help short or leggy seedlings become sturdier before they start flowering.
What pinching changes
- Encourages side branches instead of one main stem
- Creates a fuller plant for beds and containers
- Can improve stem strength and reduce flopping
- Often delays the first bloom slightly, but increases the number of flowering stems later
The best stage for pinching zinnias
The ideal time is when the plant is still young and actively growing, but established enough to recover quickly. Look for a sturdy seedling with several sets of true leaves, not just the first smooth seed leaves.
Signs your zinnia is ready
- It has at least 3 to 4 sets of true leaves
- The stem is strong enough to handle a small cut
- The plant is 6 to 12 inches tall, depending on variety and growing conditions
- It is growing steadily, not stressed by cold, drought, or transplant shock
If the plant is tiny, pale, or recently transplanted, wait a few days until it resumes active growth. A healthy, actively growing zinnia responds best.
How to pinch zinnias correctly
Use clean fingers or small snips to remove the top growing tip just above a leaf node. You want to leave at least two sets of healthy leaves below the cut so the plant can branch from those points.
- Choose a healthy stem with several sets of true leaves.
- Find a leaf node, where leaves emerge from the stem.
- Pinch or cut the stem tip just above that node.
- Remove only the soft top growth, not a large section of stem.
- Water the plant lightly if the soil is dry, and keep it growing steadily.
Clean tools matter if you are using snips. A quick wipe with rubbing alcohol helps reduce the chance of spreading disease from plant to plant.
How much to remove
Usually, removing the top 1 to 2 inches is enough for a young zinnia. On very small seedlings, only the soft tip may need to come off. Avoid cutting into woody or thick stem tissue unless the plant is mature and you are shaping it intentionally.
Seasonal timing: spring, summer, and beyond
When to pinch zinnias depends on your local season and how fast the plants are growing. In warm climates, seedlings may reach pinching size quickly. In cooler regions, growth may be slower, so timing can shift by several weeks.
Spring
Pinch spring-planted zinnias after transplanting, once they settle in and begin active new growth. If spring nights are still cool, wait until the plant is growing confidently, because cold-stressed seedlings recover more slowly.
Early summer
This is often the easiest time to pinch. Plants are usually growing fast, days are longer, and the soil is warm. Zinnias pinched in early summer often branch well and flower heavily later in the season.
Midsummer
You can still pinch zinnias in midsummer if they are vegetative and have not started forming buds. However, if the plant is already preparing to bloom, pinching may delay flowers more than you want.
Late summer
Late-season pinching is usually less useful. If your growing season is short, it may be better to let the plant bloom rather than remove the tip and wait for new branches to mature.
When not to pinch zinnias
Not every zinnia needs pinching. In some situations, leaving the plant alone is the better choice, especially if your season is short or you want the earliest possible flowers.
- Do not pinch stressed plants that are wilted, yellowing, or recently transplanted
- Skip pinching if the plant is already budding or flowering
- Leave tall cutting varieties unpinched if you want long single stems
- Avoid pinching during a cold snap or drought stress
If you are growing zinnias for a cutting garden, you may choose a lighter pinching approach. If you want a dense border or container display, pinching is usually more helpful.
Pinching zinnia seedlings vs. mature plants
Young seedlings respond best to pinching because they quickly redirect growth into side shoots. Mature plants can still be shaped, but the result is less predictable and may interrupt flowering more noticeably.
Seedlings
Seedlings are the best candidates for a first pinch. They recover quickly and often produce several new stems from the cut area.
Mature plants
If a mature zinnia is getting too tall or leggy, you can trim back a stem above a node, but expect a short pause before new growth resumes. This works best early in the season, not when the plant is already heavily in bloom.
Growing conditions that help pinched zinnias recover
Pinching works best when the plant already has good growing conditions. Healthy zinnias branch faster and bloom sooner after a pinch than weak or stressed plants.
Sunlight
Zinnias need full sun for the strongest growth and best flowering. Aim for at least 6 to 8 hours of direct sun daily. In less sun, plants may stretch and become floppy, which can make pinching less effective.
Soil and drainage
Use well-drained soil enriched with compost. Zinnias dislike soggy roots, and poor drainage can slow recovery after pinching. In heavy clay, raised beds or amended soil often work better than compacted ground.
Watering
Keep moisture even while the plant is recovering, but do not overwater. Water at the base when the top inch or two of soil feels dry. Wet foliage can encourage disease, especially in humid weather.
Common mistakes when pinching zinnias
A few simple mistakes can reduce the benefit of pinching or stress the plant. Most are easy to avoid once you know what to look for.
- Pinching too early before the seedling has enough leaves to branch well
- Pinching too late after flower buds have formed
- Removing too much stem at once
- Using dirty tools on multiple plants
- Pinching drought-stressed or recently transplanted zinnias
- Expecting every variety to respond the same way
What to expect after pinching
After pinching, the plant usually pauses briefly, then pushes new side shoots from the nodes below the cut. You may see fresh branching within a week or two in warm weather, though timing depends on temperature, sun, and plant vigor.
Do not worry if the plant looks shorter for a little while. That is normal. The goal is to trade one main stem for several flowering stems later on.
Should you pinch zinnias more than once?
Sometimes, yes. A second pinch can create an even bushier plant, but it also delays blooming further. For most home gardens, one pinch is enough. If you do pinch again, do it early and only on vigorous plants that still have plenty of time left in the season.
One pinch is usually enough when
- You want a balance of bushiness and early bloom
- Your growing season is moderate or short
- The plants are already branching well after the first pinch
A second pinch may help when
- You have a long warm season
- The plants are growing very fast and getting tall
- You want a fuller display in a border or large container
Pruning, deadheading, and pinching are not the same
Pinching is done on young growth to shape the plant. Deadheading is removing spent flowers later in the season to keep blooms coming. Both can help zinnias, but they serve different purposes.
- Pinching shapes the plant early
- Deadheading keeps mature plants flowering longer
- Pruning can be used later to tidy or reduce leggy growth
Once your zinnias start blooming, keep removing faded flowers if you want continued flowering. Cut back to a strong leaf node or remove the spent bloom stem cleanly.
Pests and diseases to watch for after pinching
Pinching itself does not usually cause pest or disease problems, but stressed plants are more vulnerable. Good airflow, clean tools, and careful watering help keep zinnias healthy.
Common issues
- Powdery mildew in humid or crowded plantings
- Aphids on soft new growth
- Spider mites in hot, dry conditions
- Leaf spots when foliage stays wet too long
If you notice pests on the tender new shoots after pinching, check plants early and remove them with a strong spray of water or another appropriate garden-safe method. Good spacing helps leaves dry faster and reduces disease pressure.
Best tools for pinching zinnias
You do not need special equipment, but the right tool makes the job cleaner and easier.
- Clean fingers for soft seedlings
- Small hand pruners or snips for thicker stems
- Rubbing alcohol or disinfectant wipes for tool cleaning
If the stem feels tough, use snips rather than tearing it. A clean cut heals better than a ragged one.
Quick guide: should you pinch your zinnias?
- Yes if the plant is young, healthy, and you want a bushier shape
- Yes if you are growing zinnias for borders, beds, or fuller containers
- No if buds are already forming and you want flowers soon
- No if the plant is stressed, recently transplanted, or struggling in poor conditions
Conclusion
If you are asking when to pinch zinnias, the best answer is simple: pinch young plants once they have several sets of true leaves and are growing strongly, but before buds appear. That timing gives you the best chance at a fuller, branchier plant with more flowers later.
Check your zinnias today, look for a healthy growing tip, and make one clean pinch if the plant is ready. Then keep them in full sun, water consistently, and deadhead spent blooms to keep the display going.
If you want to keep improving your flower bed, you may also enjoy reading about other seasonal plant care and garden maintenance topics.