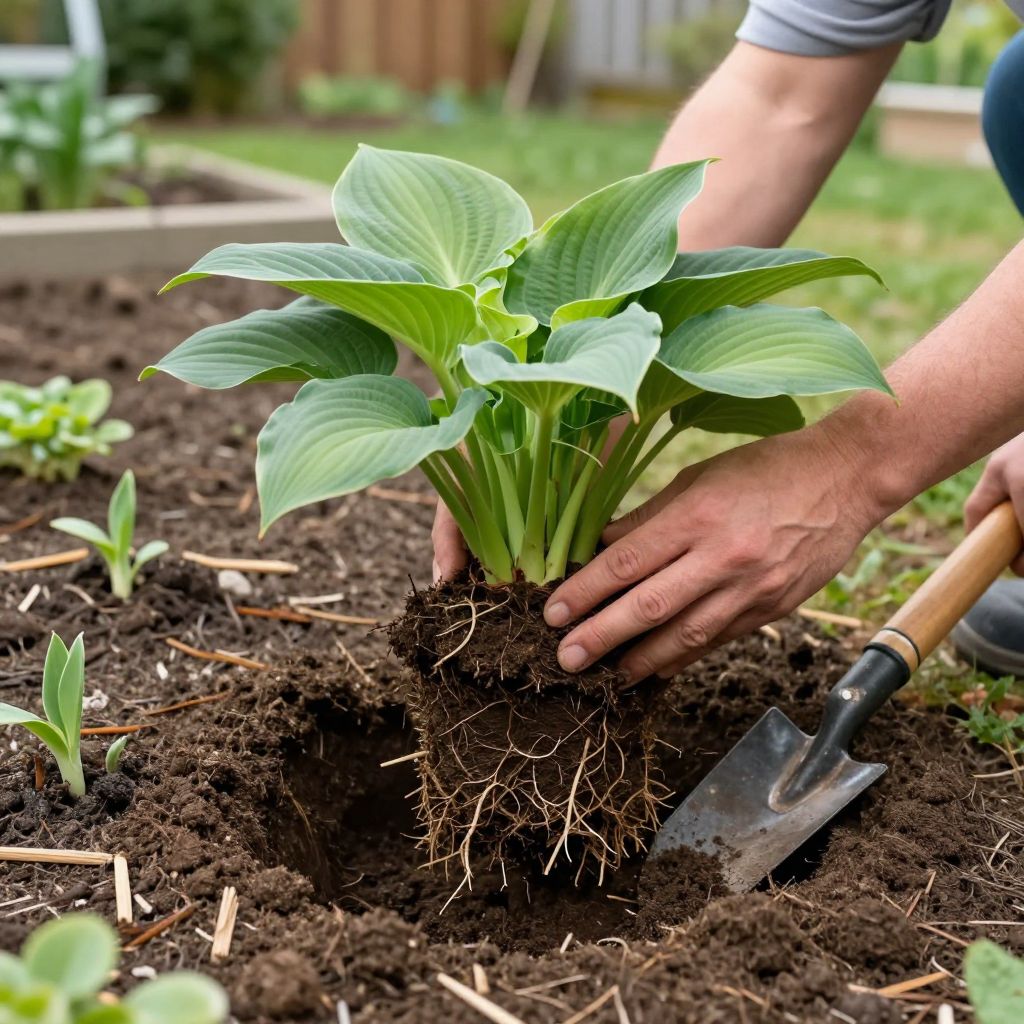
Wondering when to transplant hostas without stressing the plants or losing a season of growth? The best time is usually when temperatures are cool and the soil is workable, especially in spring or early fall. That gives hostas time to rebuild roots before summer heat or winter cold slows them down.
Hostas are tough, but they transplant best when you match the move to the plant’s growth cycle. With the right timing, good soil, and steady moisture, you can relocate them successfully, divide crowded clumps, and improve the look of a shady border.
When to transplant hostas?
The best time to transplant hostas is in early spring as new shoots emerge, or in early to mid-fall after the worst summer heat has passed. Choose a cool, cloudy day if possible, and move them when the soil is moist but not soggy so roots can re-establish quickly.
Why timing matters for hosta transplants
Hostas are shade-loving perennials that grow from fleshy roots and crowns. When you dig them up, you inevitably disturb those roots, so the plant needs time to recover before facing heat, drought, or frozen ground.
Transplanting at the wrong time can lead to slow regrowth, leaf scorch, or a plant that sits still for weeks. The goal is to reduce transplant shock and give the hosta a gentle transition into its new spot.
Best seasons at a glance
- Spring: Ideal in many climates, especially before leaves fully unfurl.
- Fall: A strong choice once nights cool down and the plant is no longer pushing fast top growth.
- Summer: Possible only with extra care, but generally the least preferred time because heat and evaporation stress the plant.
- Winter: Usually avoid transplanting unless you live in a very mild climate and the ground is workable.
How to know your hosta is ready to move
Hostas are easiest to transplant when they are actively growing but not under stress. You can usually move them when the soil is moist, the weather is mild, and the plant is not in the middle of a heat wave or drought.
Look for these signs that it is a good time:
- New shoots are just emerging in spring.
- The plant has finished its strongest summer growth and nights are cooling in fall.
- The soil can be dug without being waterlogged or rock-hard.
- The hosta is crowded, outgrowing its space, or shading nearby plants too much.
When you should wait
Delay transplanting if the plant is wilted from heat, the soil is frozen, or you are in the middle of a dry spell and cannot water consistently. A stressed hosta is much more likely to lose leaves and take longer to recover.
Step-by-step: how to transplant hostas successfully
Moving hostas is straightforward, but careful digging makes a big difference. The more of the root system you preserve, the faster the plant settles in.
- Water the plant well the day before. Moist soil is easier to dig and helps roots stay hydrated.
- Choose the new location first. Hostas prefer partial to full shade, though many tolerate morning sun if the soil stays evenly moist.
- Dig wide, not just deep. Start several inches away from the crown so you keep as many roots as possible.
- Lift the clump carefully. Use a spade or garden fork to loosen the root ball and pry it up gently.
- Divide if needed. If the clump is large, you can split it with a clean spade or knife, making sure each division has roots and at least one healthy growing point.
- Replant at the same depth. The crown should sit at the same soil level it was growing at before.
- Backfill and firm lightly. Press soil in around the roots to remove air pockets, but do not pack it hard.
- Water deeply. Soak the area to settle the soil and help the roots make contact with their new home.
How far apart to space hostas
Spacing depends on the mature size of the variety, but most hostas need room to spread. Leave enough space for the clump to expand without overcrowding nearby plants or pathways. If you are dividing a mature hosta, give each division enough room to grow into its own full clump.
Best growing conditions after transplanting
Hostas do best in rich, moisture-retentive soil with good drainage. They like organic matter, but they do not want to sit in waterlogged ground, which can rot roots and crowns.
Soil and compost
Before planting, work in compost if your soil is thin, sandy, or low in organic matter. A loose, humus-rich soil helps hostas establish faster and hold moisture more evenly.
If your soil is heavy clay, improve drainage by mixing in compost and planting slightly high rather than in a low, wet pocket. Hostas are moisture-loving, but they still need oxygen around the roots.
Sunlight
Most hostas prefer shade or dappled light, especially in hot climates. In cooler regions, some varieties can handle a bit more morning sun, but harsh afternoon sun can scorch leaves and dry the soil too quickly.
If you are moving a hosta from deep shade to a brighter spot, do it gradually if possible. Sudden exposure can cause leaf burn, even when the plant is otherwise healthy.
Watering after transplanting hostas
Newly transplanted hostas need consistent moisture while roots re-establish. The soil should stay evenly moist, not saturated. Drying out soon after transplanting is one of the main reasons hostas struggle.
Check the soil with your finger a few inches down. If it feels dry, water deeply. In warm weather, you may need to check more often, especially during the first few weeks after moving the plant.
Mulch helps a lot
A 2- to 3-inch layer of mulch can help conserve moisture, moderate soil temperature, and reduce weeds. Keep mulch a little away from the crown so the plant does not stay too wet right at the base.
Should you divide hostas when transplanting?
You do not have to divide hostas every time you move them, but transplanting is often the easiest time to do it. Mature clumps can become crowded, and dividing them can rejuvenate the plant and give you more hostas for other parts of the garden.
Divide hostas when the clump is large, the center looks weak, or you want to control size. Smaller divisions usually establish faster than huge, unwieldy clumps.
Simple division tips
- Use a clean, sharp spade or knife.
- Make sure each piece has roots and at least one growing point.
- Replant divisions promptly so roots do not dry out.
- Water well after replanting and keep an eye on moisture for several weeks.
Common transplanting mistakes to avoid
Hostas are forgiving, but a few mistakes can slow recovery. Avoiding these problems will improve your success rate.
- Transplanting in extreme heat: Hot weather increases water loss and transplant shock.
- Letting roots dry out: Even a short period out of the ground can stress the plant.
- Planting too deep: Burying the crown can lead to rot.
- Ignoring drainage: Constantly wet soil can damage roots.
- Moving a stressed plant without watering first: Dry roots are more vulnerable to damage.
- Forgetting to mulch and water after planting: New transplants need steady care to settle in.
What to expect after transplanting
It is normal for hostas to pause after being moved. Some leaves may droop or look a little tired for a short time, especially if the plant was divided. As long as the crown stays firm and the soil remains moist, the plant should recover.
In spring, you may see quick regrowth once the roots settle. In fall, the plant may focus more on root establishment than top growth, which is why timing matters so much. The real payoff often shows up the next season when the hosta fills out again.
Pests and problems to watch for
Transplanting itself does not cause most hosta problems, but stressed plants can be more vulnerable. Keep an eye out for slugs, which often chew holes in leaves, especially in damp, shady beds.
Also watch for leaf scorch in too much sun, yellowing from poor drainage, or wilt from dry soil. If the plant looks rough after moving, check moisture first before assuming disease.
A simple seasonal guide for gardeners
- Spring: Best for most gardeners; move hostas as soon as the soil can be worked and before leaves are fully expanded.
- Early fall: Also excellent; the plant can focus on root growth in cooler weather.
- Late fall: Riskier if the ground may freeze soon after planting.
- Summer: Only if necessary, and only with careful watering and some temporary shade.
Conclusion
If you are asking when to transplant hostas, aim for early spring or early fall whenever possible. Choose a cool day, keep the roots moist, replant at the same depth, and water consistently until the plant settles in. If you are planning a move, prepare the new site first so the transplant goes quickly and smoothly.
For more shade-garden help, you may also want to read about how to grow hostas in shade gardens and dividing perennials in spring and fall.