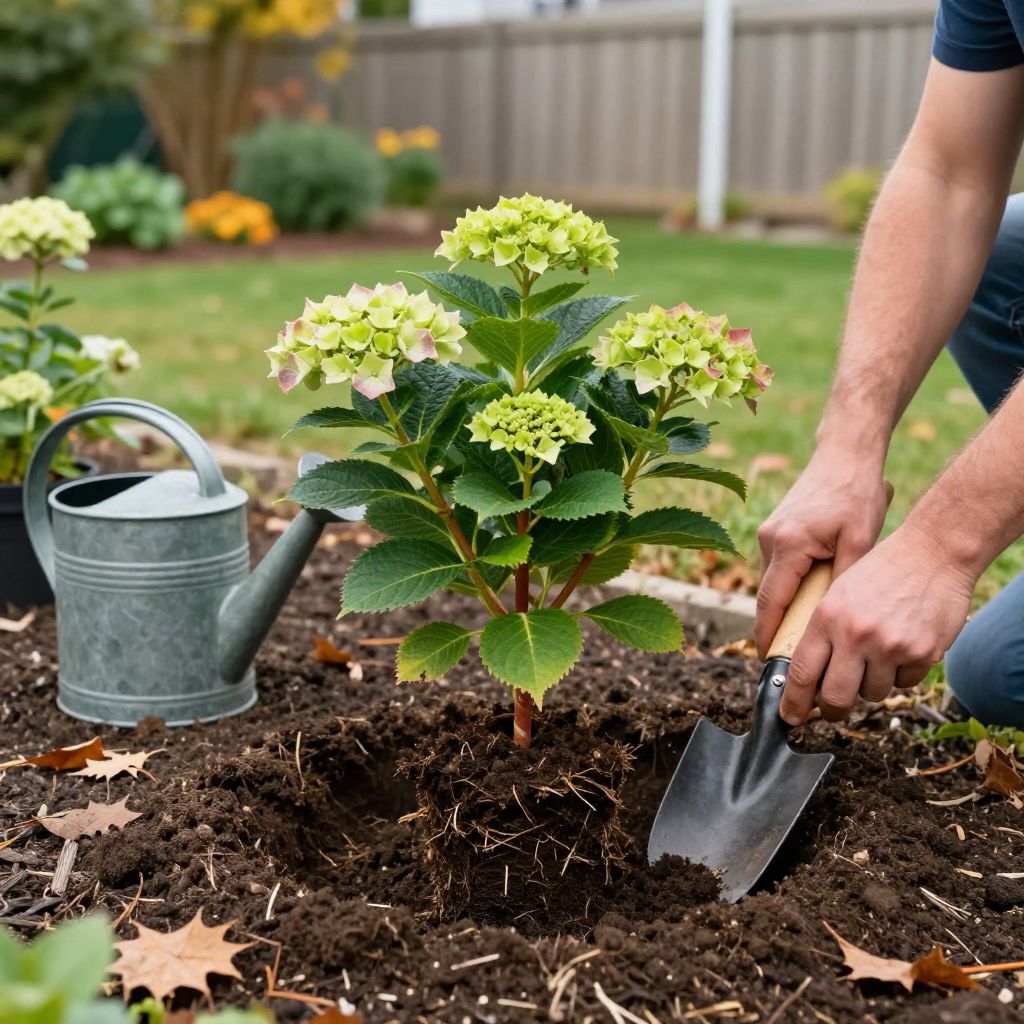
Can you plant hydrangeas in the fall? Yes—fall is often one of the best times to plant them, as long as the ground is still workable and you have enough time for roots to settle before hard freezes. Cooler air, milder sun, and more reliable moisture can reduce transplant stress.
The key is matching the timing to your climate and giving the shrub a strong start. With the right planting depth, soil preparation, and aftercare, a fall-planted hydrangea can establish well and be ready to grow strongly next spring.
Can you plant hydrangeas in the fall?
Yes, you can plant hydrangeas in the fall in many climates, and it is often ideal because cooler temperatures help roots grow without the stress of summer heat. Plant early enough for several weeks of root establishment before the ground freezes, and water consistently until the soil cools or freezes.
Why fall planting often works well
Hydrangeas are not usually at their most active in fall, but the soil is still warm enough for root growth while the top growth slows down. That balance helps newly planted shrubs focus energy below ground instead of pushing tender leaves and stems in hot weather.
Fall planting can also mean less frequent watering than summer planting, though newly installed shrubs still need attention. If you plant at the right time, your hydrangea may settle in quietly over winter and begin stronger growth in spring.
Best fall conditions for planting
- Daytime temperatures are cooling, but the ground is not frozen.
- You have at least 4 to 6 weeks before hard frost, if possible.
- The site drains well and does not stay soggy after rain.
- You can water regularly after planting.
When fall planting is a good idea—and when to wait
Fall is a good planting window if you live where autumn stays mild for a while. In colder regions, plant earlier in the season so roots can establish before winter. In areas with very early freezes, it may be safer to wait until spring.
If you are planting a hydrangea in late fall and the weather is already turning cold, the shrub may not have enough time to root in before the ground freezes. That does not always mean failure, but it increases the risk of winter damage and slower spring recovery.
Signs you should delay planting
- The soil is cold, wet, or muddy for long periods.
- A hard freeze is likely within the next couple of weeks.
- You cannot water the plant consistently after planting.
- The site has poor drainage and tends to collect water.
Choosing the right hydrangea and site
Hydrangeas vary by type, so choose one that fits your climate, light, and space. Bigleaf hydrangea (Hydrangea macrophylla) often needs protection from harsh afternoon sun, while panicle hydrangea (Hydrangea paniculata) is generally more sun-tolerant. Smooth hydrangea (Hydrangea arborescens) and oakleaf hydrangea (Hydrangea quercifolia) also have different light and moisture preferences.
Most hydrangeas do best in rich, evenly moist, well-drained soil. They appreciate morning sun with afternoon shade in hotter climates, while cooler regions may allow more sun exposure.
Site checklist before you dig
- Light: Morning sun and afternoon shade is a safe starting point for many types.
- Soil: Loamy soil with plenty of organic matter is ideal.
- Drainage: Water should not pool around the roots after rain or irrigation.
- Space: Allow room for the mature width of the shrub.
How to plant hydrangeas in the fall
Planting is straightforward, but the details matter. The biggest mistakes are planting too deep, ignoring drainage, and letting the root ball dry out. Follow these steps for the best chance of success.
- Water the plant first. If the root ball is dry, soak it thoroughly before planting.
- Dig a wide hole. Make the hole about 2 times as wide as the root ball, but no deeper than the root ball’s height.
- Check the planting depth. Set the shrub so the top of the root ball is level with or slightly above the surrounding soil.
- Loosen circling roots. Gently tease apart any roots that are wrapping around the pot.
- Backfill with native soil. Mix in a small amount of compost if the soil is poor, but do not create a “pot” of rich soil in the hole.
- Water deeply. Soak the area well to settle the soil and remove air pockets.
- Mulch lightly. Apply 2 to 3 inches of mulch, keeping it a few inches away from the stems.
What not to do
- Do not bury the crown or stems too deeply.
- Do not add a thick layer of compost only in the planting hole.
- Do not pile mulch against the trunk or stems.
- Do not let the root ball dry out between planting and watering.
Soil, compost, and drainage
Hydrangeas like soil that holds moisture but still drains well. If your garden soil is heavy clay, improve the planting area with organic matter over a broad area rather than making a tiny amended pocket. That helps roots spread into surrounding soil more naturally.
Compost can be useful if your soil is thin or compacted, but moderation matters. A few inches worked into the surrounding bed is usually better than overloading the hole with rich material that may hold too much water or create a sharp soil change.
Simple drainage test
Dig a hole about 12 inches deep and fill it with water. If the water drains away within a few hours, drainage is probably acceptable. If it remains for a long time, consider planting in a raised bed or choosing a better-drained site.
Watering after fall planting
New hydrangeas need steady moisture while roots establish. Fall weather may provide some help, but natural rainfall is not always enough. Check the soil regularly and water when the top few inches begin to dry, especially during warm, windy spells.
Deep watering is better than frequent shallow sprinkles. You want moisture to reach the root zone, not just the surface.
Watering tips for the first season
- Water thoroughly right after planting.
- Keep the soil evenly moist, not soggy.
- Water at the base of the plant to reduce leaf wetness.
- Reduce watering only when consistent cool weather and rainfall take over.
Mulching and winter protection
Mulch helps moderate soil temperature and conserve moisture, which is especially useful for fall-planted hydrangeas. A 2- to 3-inch layer of shredded bark, leaf mold, or similar organic mulch is usually enough.
In colder climates, winter protection may be helpful for newly planted shrubs, especially if they are marginally hardy in your area. The goal is not to smother the plant, but to reduce freeze-thaw stress and protect shallow roots.
Winter care for newly planted hydrangeas
- Keep mulch away from direct contact with stems.
- Water once more before the ground freezes if the soil is dry.
- Protect exposed plants from drying winter wind if needed.
- Avoid heavy pruning in fall, which can encourage tender new growth.
Pruning after fall planting
For most newly planted hydrangeas, avoid major pruning in fall. The shrub needs its leaves and stems to support root establishment, and some types bloom on old wood, which means fall pruning can remove next year’s flower buds.
If you must remove broken or damaged stems, do so lightly and only as needed. Save major shaping for the right season based on the hydrangea type you are growing.
Important pruning note
Not all hydrangeas are pruned the same way. Some bloom on old wood, some on new wood, and some on both. If you are unsure of your plant type, wait until you can identify it before cutting back heavily.
Common problems with fall-planted hydrangeas
Most issues come from planting too late, too deep, or in soil that stays wet. The good news is that many problems are preventable with careful site choice and aftercare.
Wilting leaves after planting
Some wilting is normal right after transplanting, especially if the weather is still warm. Check moisture first. If the soil is dry, water deeply. If the soil is wet but the plant still wilts, roots may be stressed from poor drainage or transplant shock.
Yellowing leaves
Yellow leaves can signal overwatering, poor drainage, or nutrient issues. In fall, the most common cause is often too much moisture around the roots. Make sure the soil is draining and not staying saturated.
Winter dieback
Late-planted hydrangeas may suffer dieback if they do not root in before freezing weather. Mulch helps, but the best protection is planting early enough for establishment and choosing a site suited to your climate.
Pests and diseases to watch for
Healthy hydrangeas are fairly resilient, but stressed plants are more vulnerable. Keep an eye out for leaf spots, powdery mildew, aphids, and other common garden pests, especially if the plant is crowded or the foliage stays wet.
Good airflow, proper spacing, and watering at the base of the plant can reduce many problems. Remove badly spotted leaves if needed, and clean up fallen debris around the shrub to limit disease carryover.
Can you propagate hydrangeas in the fall?
Fall is usually not the easiest time to propagate hydrangeas from cuttings unless you are in a mild climate and know what you are doing. Many gardeners have better success taking softwood or semi-ripe cuttings earlier in the growing season, depending on the type of hydrangea.
If you want to expand your planting, fall is better used for installing nursery plants or dividing garden plans than for starting new cuttings. That said, layering may sometimes be possible in mild weather if a low stem can root while still attached to the parent plant.
Final tips for success
If you are wondering, “Can you plant hydrangeas in the fall?” the answer is yes, and often with excellent results. Just plant early enough, choose a well-drained site, keep the soil evenly moist, and mulch lightly to protect the roots.
Before the season ends, check your local frost timing, prepare the planting spot, and get your hydrangea in the ground while conditions are still workable. If you want to keep learning, consider reading more about hydrangea care basics and how to prune hydrangeas correctly.