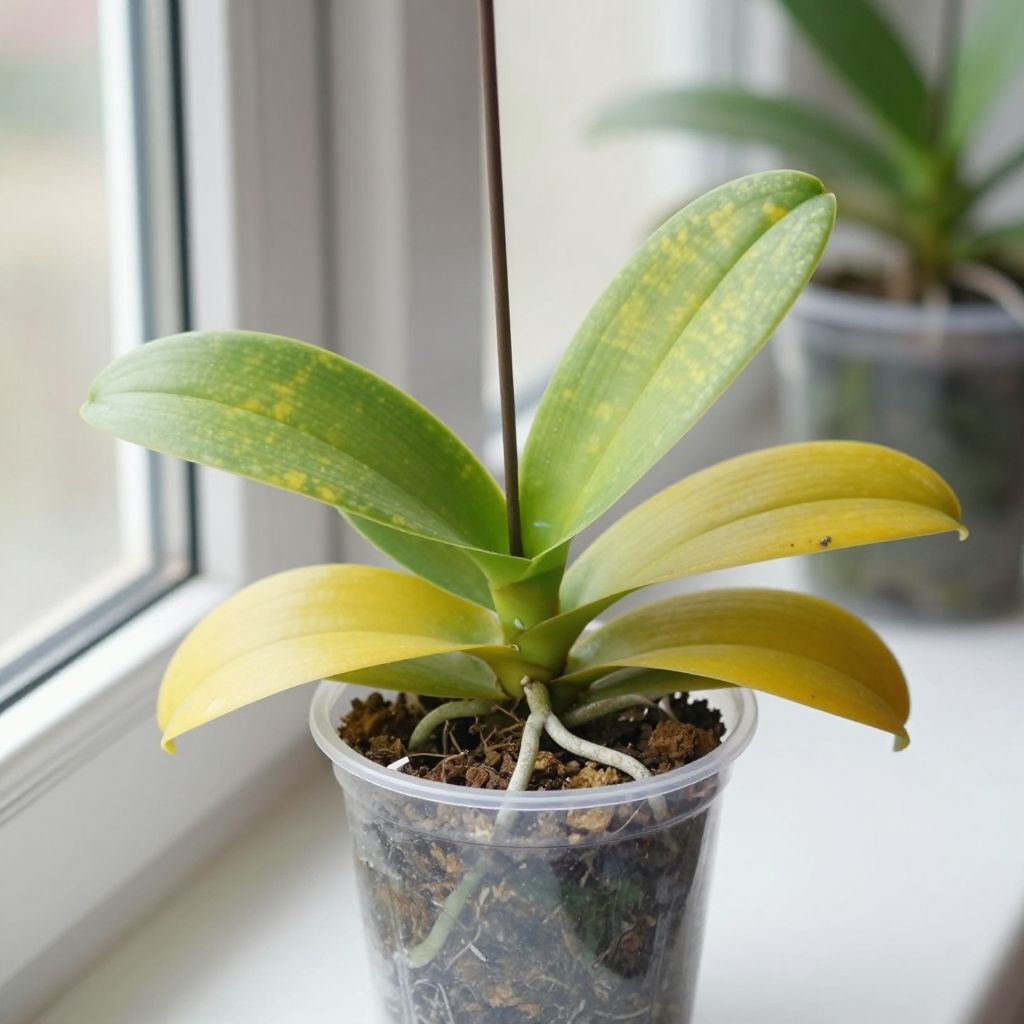
Why are my orchid leaves turning yellow? In many cases, yellowing leaves are a normal response to age, light, watering, or root stress rather than a sign your orchid is doomed. The key is to tell harmless lower-leaf yellowing from a broader plant problem. Once you know what to look for, you can usually correct the issue before it spreads.
Orchids are sensitive to their growing conditions, especially indoors. A quick check of light, roots, potting mix, and watering habits will usually point you to the cause and the fix.
Why are my orchid leaves turning yellow?
Orchid leaves turn yellow when the plant is stressed by too much water, too little light, direct sun, root damage, natural aging, pests, or disease. If only the oldest lower leaf is yellowing, it may be normal. If several leaves are yellowing at once, inspect the roots, potting mix, and light exposure right away.
Common causes of yellow orchid leaves
1. Natural aging of older leaves
It is normal for an orchid to shed its oldest leaf from time to time, especially on monopodial orchids such as Phalaenopsis. The lowest leaf may turn yellow gradually, then dry and drop while the rest of the plant stays firm and green.
What to look for:
- Only one lower leaf is yellowing
- The rest of the plant looks healthy
- Roots are firm and green or silvery, not mushy
- New roots or leaves are still growing
If that sounds like your plant, do not rush to cut the leaf off. Let it yellow fully and detach naturally unless it becomes soft or diseased.
2. Overwatering and root rot
This is one of the most common reasons orchid leaves turn yellow. Orchids need air around their roots, and constantly wet potting mix can suffocate roots and cause rot. Once roots fail, the leaves lose support and begin to yellow, wrinkle, and sometimes collapse.
Signs of overwatering:
- Mix stays wet for many days
- Roots look brown, black, hollow, or mushy
- Leaves feel limp or soft rather than firm
- The pot may smell sour or stale
What to do:
- Slide the orchid out of the pot and inspect the roots.
- Trim away dead, mushy roots with clean, sterilized scissors.
- Repot in fresh orchid bark or another airy orchid mix.
- Use a pot with drainage holes and, if possible, ventilation.
- Water only when the mix is nearly dry and the roots look silvery.
Do not let the orchid sit in a decorative cachepot with collected water. Even a small amount of standing water can keep roots too wet.
3. Underwatering or uneven watering
Less often, yellowing leaves can follow drought stress. If the potting mix dries out for too long, roots may shrink or stop functioning properly. The leaves may yellow, wrinkle, or feel leathery, especially in warm, dry indoor air.
Signs of underwatering:
- Roots look dry, shriveled, or papery
- Leaves are thin, wrinkled, or limp
- Potting mix is bone dry for long periods
- Flower buds may drop before opening
Water thoroughly so the entire root zone is moistened, then let excess drain away completely. Orchids generally do better with a deep watering followed by drying than with frequent light sips that only wet the surface.
4. Too much direct sun
Orchid leaves can yellow when they receive harsh sun, especially through a hot window. Sunburn often starts as pale yellow patches and can progress to bleached, tan, or brown damaged areas. The leaf may feel warm at the time of exposure and later become leathery.
Good light for many common indoor orchids:
- Bright, indirect light
- East-facing windows are often ideal
- South or west windows may need a sheer curtain
- Leaves should be bright green, not dark green and not bleached
If the yellowing is on the side facing the window, move the plant back a little or filter the light. A healthy orchid should get enough light to bloom without being scorched.
5. Too little light
Insufficient light can also cause yellowing, though the leaves often become a lighter green first. The plant may look weak, stop growing, or fail to bloom. In low light, orchids may use up older leaves faster than they can replace them.
If your orchid sits far from a window or in a dim room, move it to brighter indirect light gradually. Sudden changes can stress the plant, so adjust it over several days if possible.
6. Poor drainage or compacted potting mix
Orchid roots need air as much as water. Over time, bark breaks down and becomes dense, holding too much moisture around the roots. Even if you water carefully, an old or compacted mix can still lead to yellowing leaves.
Repot if you notice:
- Mix that looks broken down, fine, or muddy
- Roots packed tightly with little airflow
- Water pooling in the pot instead of passing through
- It has been a long time since the last repotting
Most orchids grown in bark-based media need repotting when the mix starts to degrade, not just when the pot looks full. Use a fresh, airy orchid mix suited to the type of orchid you grow.
7. Temperature stress or drafts
Sudden temperature swings can trigger yellowing, especially in houseplants near heaters, air conditioners, or cold windows. Orchids dislike repeated hot-and-cold stress. Leaves may yellow, droop, or develop patchy damage after exposure to extremes.
Keep orchids away from direct blasts of hot or cold air. Night temperatures that are too low for the species, or daytime heat that dries the plant too quickly, can both cause problems. If you grow orchids outdoors in warm weather, bring them in before temperatures drop below the plant’s comfort range.
8. Fertilizer issues
Too much fertilizer can burn roots and contribute to yellow leaves, while too little feeding over a long period may leave the plant weak. Orchids generally need light feeding, not heavy fertilizing. Salt buildup in the potting mix can also damage roots.
Watch for fertilizer-related stress:
- White crust on the pot or mix surface
- Root tips turning brown or black
- Yellowing leaves after heavy feeding
- Leaf edges looking scorched
If you suspect fertilizer burn, flush the pot thoroughly with clean water and reduce feeding. Use a balanced orchid fertilizer at a gentle rate appropriate for the product label, and feed only when the plant is actively growing and the roots are healthy.
9. Pests and disease
Mealybugs, scale, spider mites, and fungal or bacterial problems can all contribute to yellow leaves. Pests often hide on leaf undersides, in leaf joints, or near the crown. Disease may show as soft spots, spreading yellow areas, or foul-smelling tissue.
Check for:
- Sticky residue or cottony clusters
- Raised brown bumps on leaves or stems
- Fine webbing or stippling from spider mites
- Soft, wet, or dark patches on leaves
Isolate the plant if you suspect pests or disease. Remove badly affected tissue with clean tools, improve air circulation, and treat the problem promptly with an appropriate control method for the pest or infection.
How to diagnose the problem step by step
If you are not sure why your orchid leaves are turning yellow, use this simple check:
- Look at which leaves are yellowing. One old lower leaf is often normal. Multiple leaves suggest a bigger issue.
- Check the roots. Healthy roots are firm. Green roots are wet; silvery roots are dry. Brown, mushy roots mean rot.
- Feel the potting mix. It should not stay soggy for long periods or dry out to dust for extended stretches.
- Review the light. Yellowing in a sunny window may mean scorch; weak, pale growth may mean too little light.
- Inspect for pests. Look closely at leaf undersides and joints.
- Consider recent changes. Repotting, moving the plant, fertilizer changes, or temperature swings can all trigger stress.
This approach helps you avoid guessing and makes it easier to fix the actual cause instead of just treating the symptom.
What to do right away
Once you identify the likely cause, act quickly but gently. Orchids recover best when you correct the environment before the damage spreads.
- Adjust watering so the roots are not staying wet too long.
- Move the plant to bright, indirect light if sunburn or low light is suspected.
- Repot if the mix is broken down or the roots are rotting.
- Remove dead roots with sterilized scissors.
- Isolate and treat pests before they spread to other houseplants.
- Wait before feeding heavily if the plant is stressed.
Do not remove healthy green leaves just because one leaf has yellowed. Leaves still photosynthesize, and the plant may need them while it recovers.
How to prevent yellow orchid leaves in the future
Prevention is mostly about steady care and good growing conditions. Orchids do best when their roots can breathe and their leaves get bright, filtered light.
Good orchid care habits
- Use a pot with drainage holes
- Choose an airy orchid mix, not regular garden soil
- Water based on root color and pot dryness, not a fixed calendar
- Keep the crown from staying wet for long periods
- Provide bright, indirect light
- Repot before the mix breaks down completely
- Check leaves and roots regularly for early warning signs
Indoor orchids often do best in a stable spot with moderate humidity and good airflow. Outdoor orchids need protection from heavy rain, scorching sun, and cold nights unless they are suited to your climate.
When yellow leaves are normal, and when to worry
A single yellow lower leaf on an otherwise healthy orchid is often nothing to fear. Worry when yellowing spreads quickly, multiple leaves change color at once, or the roots are soft and failing.
Get concerned if you see:
- Several leaves yellowing at the same time
- Soft, collapsing, or blackened roots
- Yellowing with mushy spots or bad odor
- Rapid decline after watering or repotting
- Pests or sticky residue on leaves
If the plant is declining fast, remove it from the pot and inspect the roots immediately. Early action often makes the difference between recovery and loss.
Conclusion
If you are asking, “Why are my orchid leaves turning yellow?” start with the roots, light, and watering pattern. Those three factors explain most cases. Check whether the yellowing is natural aging or a sign of stress, then correct the growing conditions and let the plant recover.
For more help with healthy houseplant care, you may also want to read about orchid repotting basics and how to water houseplants correctly.