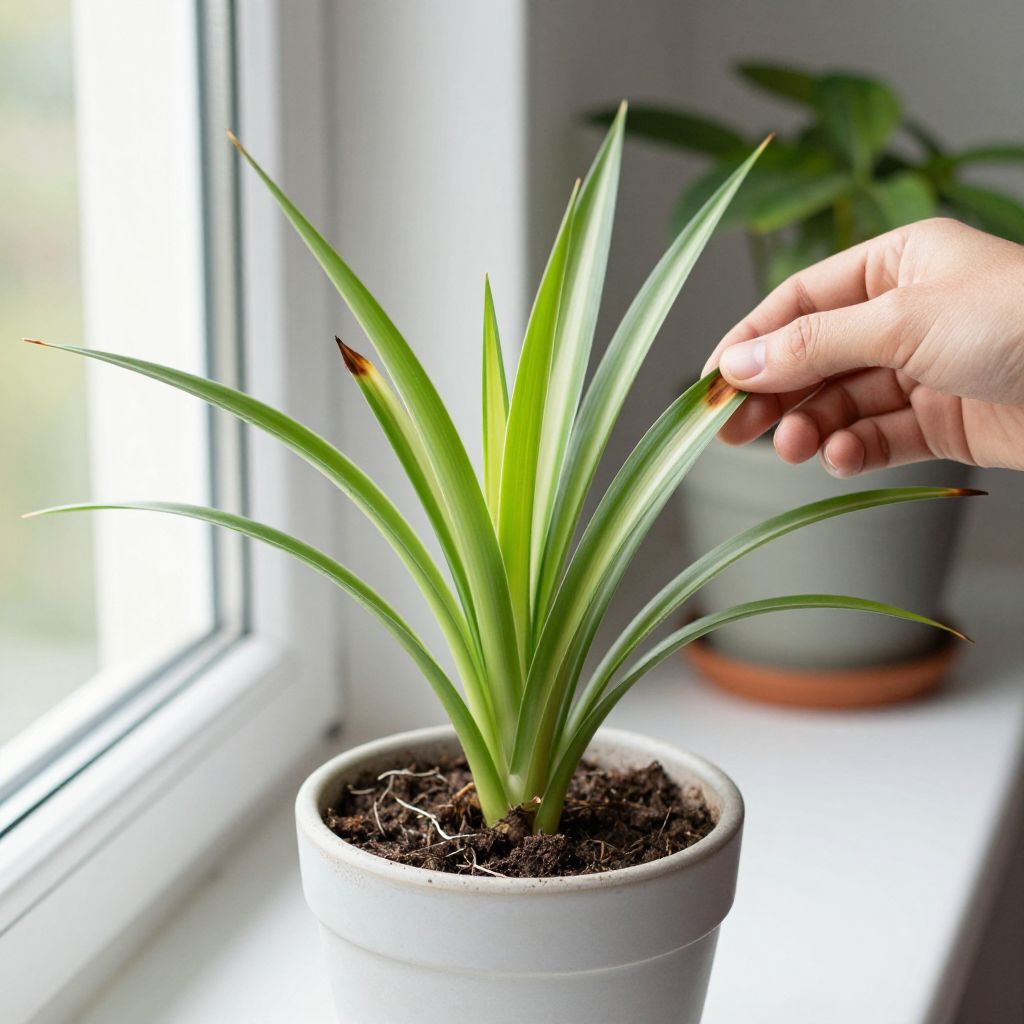
Why are the tips of my spider plant turning brown? In most cases, it’s a sign of a care issue rather than a serious disease. Spider plants often develop brown tips from inconsistent watering, mineral buildup in the soil, too much fertilizer, low humidity, or water quality problems.
The good news is that brown tips are usually easy to manage once you identify the cause. With a few adjustments to watering, light, and feeding, your spider plant can keep producing healthy green leaves and baby plantlets.
Why are the tips of my spider plant turning brown?
Spider plant tip burn is usually caused by stress from water quality, fertilizer salts, dry air, or irregular watering. Less often, it’s linked to root problems, harsh direct sun, or physical damage. The brown tissue will not turn green again, but you can stop new browning by correcting the growing conditions.
Common causes of brown spider plant tips
1. Fluoride, chlorine, or mineral buildup in water
Spider plants are notably sensitive to chemicals and dissolved minerals in tap water, especially fluoride and salts. Over time, these can accumulate in the potting mix and burn the leaf tips.
If your tap water is hard, heavily treated, or you notice white crust on the soil surface or pot rim, water quality may be the main issue.
2. Too much fertilizer
Overfeeding is one of the most common reasons spider plant tips turn brown. Even a balanced houseplant fertilizer can cause tip burn if applied too often or at too strong a concentration.
Spider plants usually need only light feeding during active growth. If you fertilize on a regular schedule without checking the plant’s response, salts can build up and damage the roots and leaf tips.
3. Inconsistent watering
Allowing the potting mix to dry out too much, then soaking it heavily, can stress the plant. Spider plants prefer evenly moist soil that dries slightly at the surface between waterings.
Repeated dry spells can cause the leaf tips to brown first, especially in warm rooms or during summer.
4. Low humidity or dry indoor air
Spider plants tolerate average indoor humidity, but very dry air can still lead to browning tips. This is more common in winter when heating systems dry the air or in homes with constant air conditioning.
Dry air alone may not be the only cause, but it often makes other problems worse.
5. Too much direct sun
Spider plants grow best in bright, indirect light. Strong direct sun, especially through a hot window, can scorch the leaves and cause brown, crispy tips or patches.
If the plant is near a south- or west-facing window, the light may be stronger than it seems, particularly in summer.
6. Root stress or poor drainage
When a spider plant sits in soggy soil or a pot without drainage holes, the roots can suffer. Damaged roots cannot move water and nutrients properly, which can show up as brown tips and weak growth.
Rootbound plants can also struggle. If the roots are packed tightly in the pot, the plant may dry out too fast and become stressed between waterings.
7. Natural aging and minor mechanical damage
Older leaves sometimes develop brown tips as they age, especially if the plant has been moved, bumped, or trimmed repeatedly. This is usually minor and not a sign of serious decline.
However, if many leaves are browning quickly, look for a care issue rather than assuming it’s normal aging.
How to fix spider plant brown tips
Check your water first
If you suspect water quality, try switching to filtered, distilled, or rainwater for a few weeks. This is often the simplest and most effective change for spider plants with recurring brown tips.
If you use tap water, let it sit overnight only if your main concern is chlorine. That will not remove fluoride or dissolved minerals, so it may not solve the problem completely.
Flush the potting mix
If fertilizer salts or mineral buildup may be part of the problem, flush the soil thoroughly. Water the plant slowly until plenty of water runs out of the drainage holes, then let it drain completely.
Repeat this once or twice over a few waterings if the soil has a visible crust or the plant has been overfertilized. Do not leave the pot standing in runoff water.
Adjust your watering routine
Water when the top 1 to 2 inches of potting mix feel dry, but before the entire root ball becomes bone dry. The exact timing depends on pot size, light, temperature, and humidity.
- Use your finger to test the soil rather than watering by calendar.
- Water deeply until excess drains out.
- Empty saucers after watering.
- Do not let the plant sit in water for long periods.
Reduce fertilizer use
If you feed your spider plant regularly, pause fertilizing for a month or two and see whether new growth improves. When you resume, use a diluted houseplant fertilizer and feed only during active growth if the plant is healthy and growing well.
A spider plant in lower light, cool conditions, or winter dormancy needs less feeding than one growing vigorously in bright indoor light.
Improve humidity and airflow
If your home is very dry, move the plant away from heating vents, radiators, or drafty spots. Grouping plants together can help slightly, and a pebble tray may provide a small boost in humidity.
Good airflow matters too. A stagnant, overly damp corner can encourage root issues, while a dry, hot corner can worsen tip burn.
Move the plant to better light
Place spider plants in bright, indirect light for best growth. An east-facing window or a spot a few feet back from a sunny window often works well.
If the leaves are bleaching, curling, or browning on the sun-facing side, shift the plant farther from direct rays or filter the light with a sheer curtain.
Repot if the plant is rootbound or the soil is poor
If roots are circling the pot, pushing up from the surface, or growing out of the drainage holes, repot into a container one size larger. Use a fresh, well-draining potting mix.
Repotting also helps if the old mix has broken down, stays soggy too long, or has a heavy salt crust. Choose a pot with drainage holes every time.
How to trim brown spider plant tips
You can trim brown tips for appearance, but do it carefully so you do not create more damage. Use clean, sharp scissors or pruning snips.
- Follow the natural shape of the leaf tip.
- Cut only the brown portion when possible.
- Leave a thin brown edge if needed rather than cutting into healthy green tissue.
- Disinfect tools if you are trimming multiple plants or suspect disease.
Trimming improves appearance, but it does not fix the cause. If you keep seeing new brown tips, focus on water, fertilizer, and light conditions.
When brown tips are a sign of a bigger problem
Brown tips alone are usually not serious, but watch for other symptoms that suggest more than simple tip burn.
- Yellowing leaves along with brown tips may point to overwatering or root stress.
- Soft, mushy roots or stems can indicate rot.
- Webbing, speckling, or sticky residue may signal pests such as spider mites or scale.
- Large brown patches can suggest sun scorch or severe water stress.
- New growth that is pale and weak may mean the plant needs better light or a repot.
Checking for pests
Spider plants are generally tough, but indoor pests can still cause stress. Inspect the undersides of leaves and the crown for fine webbing, tiny moving dots, or small bumps on stems.
If pests are present, isolate the plant and treat it promptly with the least disruptive method that suits the pest and your growing conditions.
Preventing brown tips in the future
Prevention is mostly about consistency. Spider plants do best when their roots stay healthy and their growing conditions stay steady.
- Use filtered, distilled, or rainwater if your tap water is hard or heavily treated.
- Fertilize lightly, and less often in winter or low light.
- Keep the plant in bright, indirect light.
- Water thoroughly, then let excess drain away.
- Repot when the plant becomes rootbound or the mix breaks down.
- Rinse the soil occasionally to help prevent salt buildup.
If you grow your spider plant outdoors in warm weather, protect it from harsh afternoon sun, drying wind, and heavy rain that can keep the container soggy. Bring it back inside before temperatures drop below what your local climate safely allows for tender houseplants.
What to expect after you make changes
Brown tips will not heal, so judge progress by the new growth. Healthy new leaves should emerge with cleaner green tips if the underlying issue is fixed.
If the plant continues to brown after 3 to 6 weeks of improved care, review the basics again: water quality, fertilizer use, drainage, root health, and light exposure. Often more than one factor is involved.
Conclusion
If you’re asking, “Why are the tips of my spider plant turning brown?” start with the most common causes: water quality, fertilizer buildup, inconsistent watering, and dry indoor air. Make one change at a time, and watch the newest leaves for improvement. For more houseplant care guidance, you may also want to read about indoor plant watering basics and how to repot houseplants without stress.