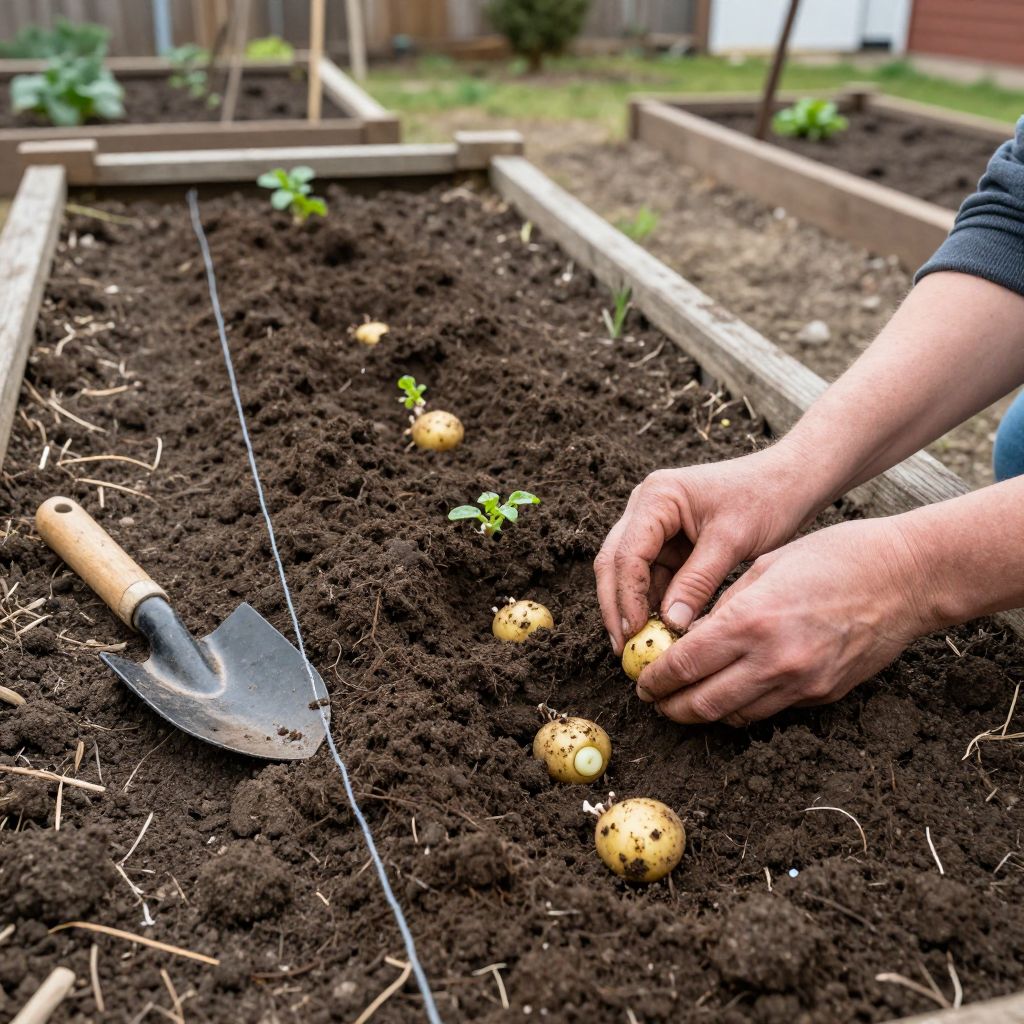
Wondering when to plant potatoes zone 7 gardeners can count on for a strong crop? The best time is usually in early spring, as soon as the soil can be worked and before hot weather arrives. In many Zone 7 areas, that means planting seed potatoes from late February through March, with local frost dates and soil temperature guiding the exact timing.
Getting the timing right matters because potatoes grow best in cool weather. Plant too early in cold, soggy soil and the tubers may rot; plant too late and summer heat can reduce tuber set and quality.
When to plant potatoes zone 7?
In Zone 7, plant potatoes in early spring once the soil is workable and has warmed to about 45–50°F. A good rule is to plant 2–4 weeks before your average last frost date, which often falls in March or early April depending on your exact location. For a fall crop, only gardeners with a long enough season should try a second planting in late summer.
Why timing matters in Zone 7
Potatoes are a cool-season crop. They form best when daytime temperatures are moderate and nights are cool, and tuber development slows when the soil gets too warm.
Zone 7 gives you a useful spring window, but that window can be short. Your goal is to get the plants established early enough that they can bulk up before the first stretch of hot weather.
What Zone 7 usually means for planting
- Spring planting: late February through March in many Zone 7 areas
- Soil temperature target: about 45–50°F for planting
- Frost timing: plant before the last frost if the soil is workable
- Heat risk: late-planted potatoes may struggle once temperatures climb
If you are unsure of your local frost date, check with a nearby extension office or use a local planting calendar. Microclimates matter: a sheltered urban yard may warm earlier than a low, damp garden bed.
How to prepare the soil for potatoes
Potatoes prefer loose, well-drained soil that is easy for tubers to expand in. Heavy clay can work if it is improved, but compacted soil often leads to misshapen potatoes and poor drainage.
Before planting, loosen the bed to a depth of at least 8–10 inches. Mix in compost to improve structure and moisture retention, but avoid fresh manure, which can encourage scabby tubers and overly lush top growth.
Best soil conditions
- Drainage: essential, especially in spring rains
- Texture: loose loam is ideal
- Organic matter: compost helps soil hold moisture without becoming waterlogged
- pH: slightly acidic to near neutral is generally suitable
If your soil stays wet after rain, consider raised beds, mounded rows, or containers. Potatoes do not like sitting in soggy soil, and poor drainage raises the risk of rot.
How to plant seed potatoes in Zone 7
Use certified seed potatoes rather than supermarket potatoes. Seed potatoes are grown for planting and are less likely to carry disease.
- Cut larger seed potatoes into pieces if needed, making sure each piece has at least one or two eyes.
- Let cut pieces dry for a day or two so the cut surfaces can callus.
- Plant pieces 3–4 inches deep in loose soil.
- Space plants about 12 inches apart in rows 2–3 feet apart.
- Water lightly after planting if the soil is dry.
In cooler spring soil, shallow planting helps sprouts emerge faster. As the plants grow, you will mound soil around the stems to protect developing tubers from sunlight.
Chitting: should you sprout potatoes first?
Many gardeners in Zone 7 like to chit, or pre-sprout, seed potatoes before planting. Place them in a bright, cool spot for a couple of weeks so short, sturdy sprouts develop.
This is optional, but it can help you get a quicker start in spring. Keep sprouts short and firm; long, weak sprouts break easily during planting.
How to care for potatoes after planting
Potatoes need steady moisture, good soil coverage, and regular hilling. Once shoots appear, keep the soil evenly moist but not saturated.
Water deeply when needed rather than giving frequent shallow watering. Consistent moisture is especially important during tuber formation, but wet foliage and soggy soil can invite disease.
Hilling potatoes
When plants are 6–8 inches tall, pull soil up around the stems, leaving the top few leaves exposed. Repeat every couple of weeks as the plants grow.
Hilling helps prevent tubers from turning green in sunlight. Green potatoes contain solanine and should not be eaten, so this step is important.
Sunlight and spacing
- Sun: full sun is best, ideally 6 or more hours daily
- Airflow: good spacing helps reduce disease pressure
- Mulch: straw or shredded leaves can help conserve moisture and suppress weeds
Do not let weeds compete heavily with young potato plants. Weeds steal moisture and nutrients and make hilling more difficult.
Fertilizing potatoes without overdoing it
Potatoes benefit from fertile soil, but too much nitrogen can produce big leafy plants with fewer tubers. Compost is often enough in a well-prepared garden bed.
If you use a fertilizer, choose one that supports root and tuber growth rather than pushing excessive foliage. Follow the product label and avoid overfeeding, especially early in the season.
Signs of nutrient imbalance
- Too much nitrogen: lush vines, delayed tuber production
- Poor soil fertility: weak growth, small harvests, pale leaves
- Uneven watering: cracked or knobby tubers
Soil testing is the best way to know what your bed needs. It is especially helpful if you have never grown potatoes there before.
Common pests and diseases in Zone 7
Potatoes can face pest and disease pressure in spring as temperatures rise. Catching problems early makes a big difference.
Watch for these pests
- Colorado potato beetles: striped adults and orange larvae can defoliate plants quickly
- Aphids: may cluster on new growth and spread disease
- Cutworms: can damage young seedlings at soil level
Inspect plants often, especially the undersides of leaves. Hand-picking beetles and larvae can help in small gardens. Row covers may protect young plants early on, but remove them once flowering begins if pollination or access is needed.
Common diseases
- Early blight: leaf spots that start lower on the plant
- Late blight: a serious disease that spreads quickly in cool, wet conditions
- Scab: rough, corky patches on tubers, often linked to dry soil or soil conditions
- Rot: more likely in poorly drained beds
To reduce disease risk, rotate potatoes and other nightshades to a new bed every year or two if possible. Avoid overhead watering late in the day, and remove diseased plant debris from the garden.
Can you plant a second crop in Zone 7?
Sometimes, but it depends on your local climate and how long your growing season lasts. A fall potato crop is more challenging in Zone 7 because tubers need time to size up before cold weather arrives.
If you want to try a second planting, use early-maturing varieties and count backward from your first expected frost date. You will need enough warm, frost-free weeks for the plants to grow and mature. In many Zone 7 gardens, spring planting is the more reliable choice.
When to harvest potatoes
New potatoes can be harvested a few weeks after flowering, but full-size potatoes need more time. For storage potatoes, wait until the vines begin to yellow and die back.
After the tops die back, let the tubers sit in the ground for about 1–2 weeks if the weather is dry, then harvest carefully with a garden fork. Avoid cutting or bruising the tubers.
Harvesting tips
- Dig on a dry day if possible
- Lift from the side of the row to avoid spearing tubers
- Brush off excess soil gently
- Let potatoes cure in a dark, airy place before storing
Do not leave harvested potatoes in direct sun. Light turns them green quickly and can make them unsafe to eat.
Best mistakes to avoid
Most potato problems in Zone 7 come from planting at the wrong time or growing in poor conditions. A few simple habits can prevent trouble.
- Planting too late: hot weather can reduce yields
- Using wet, compacted soil: increases rot and poor tuber shape
- Skipping hilling: exposes tubers to light
- Overwatering: can suffocate roots and encourage disease
- Using grocery store potatoes: may introduce disease or poor sprouting
If your spring is unusually wet, wait a little longer for the bed to dry enough to work. A few days of delay is better than planting into cold mud.
Quick Zone 7 potato planting checklist
- Check your average last frost date
- Wait until soil is workable and around 45–50°F
- Prepare loose, well-drained soil with compost
- Plant certified seed potatoes 3–4 inches deep
- Space plants about 12 inches apart
- Hilling begins when shoots are 6–8 inches tall
- Keep moisture even and watch for pests
- Harvest when vines die back for mature potatoes
If you want to grow more cool-season crops alongside potatoes, it can help to compare planting windows and bed preparation needs before spring arrives. A little planning now makes the whole garden season easier and more productive.