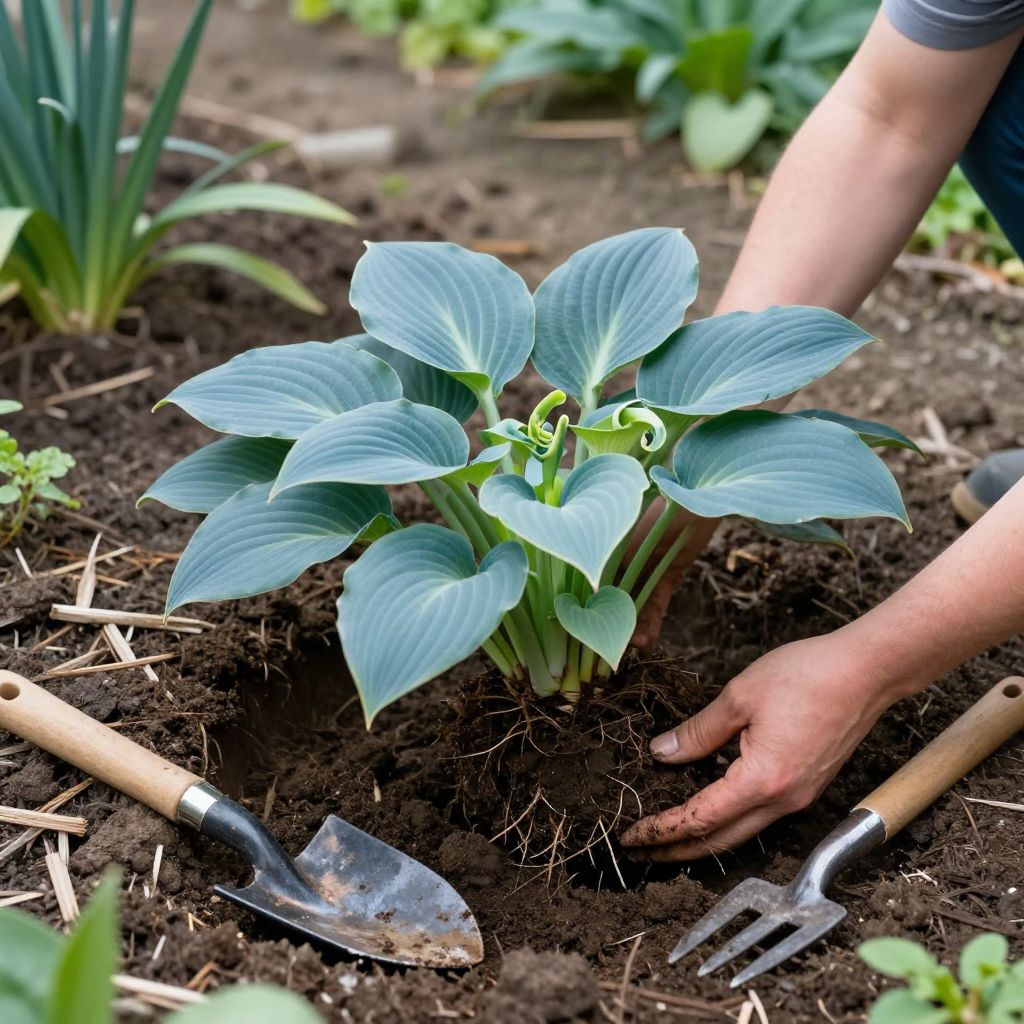
Wondering when is the best time to transplant hostas without stressing the plants? Timing matters because hostas root fastest when temperatures are cooler and the soil stays evenly moist, giving them time to recover before summer heat or winter cold arrives.
The good news is that hostas are forgiving perennials. If you choose the right season, prepare the new site well, and keep the roots from drying out, most divisions and transplants settle in reliably.
When is the best time to transplant hostas?
The best time to transplant hostas is usually early spring, just as new shoots emerge, or early fall, when nights cool and the plants are still actively growing. These seasons reduce heat stress and help roots re-establish before extreme weather. Avoid transplanting during hot, dry midsummer unless you can provide close aftercare.
Why spring and fall work best
Hostas grow from fleshy crowns and shallow roots, so they resent drying out while they recover. Cool air, moist soil, and moderate sunlight help them rebuild roots instead of fighting heat stress.
Spring transplanting
Move hostas in spring when the shoots are just poking through the soil and before the leaves unfurl fully. At this stage, the plant is beginning active growth, which helps it rebound quickly.
Spring transplanting is especially useful if you want to divide crowded clumps. The plant has the whole growing season ahead to recover.
Fall transplanting
Early fall is another excellent window, usually several weeks before the ground freezes. The soil is still warm enough for root growth, but cooler air reduces moisture loss from the leaves.
Fall is often the easiest time to transplant established hostas because the foliage is mature and the plant is no longer pushing out rapid top growth.
When to avoid transplanting
- Midday heat in summer, especially during dry spells
- Late fall, when roots will not have time to establish before freezing temperatures
- Frozen or waterlogged soil, which makes digging difficult and can damage roots
- During drought stress, unless you can water consistently afterward
How to tell if your hosta is ready to move
Hostas are ready to transplant when the clump is large enough to lift cleanly and the weather is mild enough for recovery. If the plant is struggling in too much sun, has outgrown its space, or is crowded by nearby shrubs or perennials, moving it can improve both appearance and vigor.
Good signs it’s time
- The clump is becoming crowded or spreading into walkways
- Leaves are smaller than usual because the plant is crowded
- The site has become too sunny or too dry
- You want to divide a mature clump to create more plants
Signs to wait
- The plant is already wilting from heat or drought
- New growth is soft and vulnerable during a heat wave
- The soil is extremely dry, hard, or frozen
How to transplant hostas step by step
Transplanting hostas is straightforward if you work carefully and keep the roots moist. A cloudy day or cool morning is ideal.
- Water the plant the day before so the root ball is hydrated and easier to lift.
- Prepare the new hole first. Make it as deep as the root mass and about 1.5 to 2 times as wide.
- Loosen the soil around the clump with a spade or garden fork, working several inches beyond the outer edge.
- Lift the hosta carefully, keeping as much root mass intact as possible.
- Divide if needed by separating the crown into sections with roots and at least one or two growing points each.
- Set the plant at the same depth it was growing before. Do not bury the crown too deeply.
- Backfill with native soil mixed with a little compost if needed, then firm gently.
- Water thoroughly to settle the soil and remove air pockets.
- Mulch lightly with 2 to 3 inches of organic mulch, keeping it away from the crown.
Tools that make the job easier
- Spade or digging fork
- Sharp garden knife or hori-hori for dividing
- Bucket or tarp to carry divisions
- Watering can or hose
- Organic mulch such as shredded bark or leaf mold
Choosing the right site after transplanting
Hostas generally prefer part shade to shade, especially in warmer climates. Some varieties tolerate more sun in cool regions, but most perform best with morning sun and afternoon shade.
Good drainage matters just as much as light. Hostas like evenly moist soil, but they do not want to sit in soggy ground.
Ideal soil conditions
- Rich, organic soil
- Good moisture retention without standing water
- Loose texture that roots can penetrate easily
If your soil is heavy clay, work in compost to improve structure. If it is very sandy, compost helps it hold moisture longer.
Aftercare: helping hostas recover
After transplanting, the goal is steady moisture and low stress. Hostas often pause briefly after being moved, then resume growth once roots settle in.
Watering after transplanting
Keep the soil consistently moist, especially during the first few weeks. Water deeply when the top inch or so begins to dry, adjusting for rainfall and soil type.
Do not let the root zone dry out right after transplanting. That is the most common reason hostas struggle.
Mulching and shade protection
A light mulch helps conserve moisture and moderate soil temperature. If the plant was moved into a brighter spot, temporary shade cloth or a nearby umbrella-like plant can reduce stress during the first week or two.
What to expect after the move
- Some wilting is normal for a few days
- Leaf edges may look tired if roots were disturbed
- New growth should gradually appear once the plant re-establishes
Dividing hostas at the same time
Many gardeners divide hostas when transplanting them. This is useful for renewing old clumps, controlling size, and creating more plants for other parts of the garden.
Smaller divisions establish faster than huge chunks, but each section should still have enough roots and at least one healthy crown section to grow well.
Simple division tips
- Use a clean, sharp spade or knife
- Divide on a cool day if possible
- Keep divisions shaded and moist while you work
- Replant divisions promptly rather than leaving roots exposed
Common transplanting mistakes to avoid
Most hosta problems after moving come from heat, poor planting depth, or dry roots. A few small mistakes can slow recovery significantly.
- Transplanting in hot weather without extra watering
- Planting too deep, which can encourage crown rot
- Leaving roots exposed to sun and wind while you work
- Overcrowding the new hole with too much compost or fertilizer
- Using too much sun for a variety that prefers shade
It is usually better to keep the planting hole simple and let the plant adapt to the surrounding soil than to create a “perfect” pocket that holds too much water.
Troubleshooting after transplanting
If your hosta looks unhappy after moving, check the basics first: moisture, depth, and light. Most issues are fixable if caught early.
Wilting leaves
Temporary wilting is common, especially if the plant lost roots during digging. Water deeply and keep the soil evenly moist. If the site gets afternoon sun, provide temporary shade.
Yellowing or scorched leaves
Yellowing can happen from transplant shock, while crispy patches often mean too much sun or wind exposure. If the plant was moved into a brighter location, consider relocating it again during the next cool season.
Slow recovery
Slow growth after transplanting is normal for a short time. If the plant remains stalled for weeks, inspect the crown for rot, check drainage, and make sure the roots are not buried too deeply.
Pests and diseases to watch for after moving
Transplanted hostas can be more vulnerable while they recover, especially if they are stressed. Slugs and snails are the most common pests, and they tend to target tender new growth.
Preventing pest damage
- Keep mulch away from the crown to reduce hiding spots
- Check plants in the evening or early morning for slug activity
- Remove damaged leaves and garden debris where pests shelter
Good airflow, proper spacing, and avoiding soggy soil also help reduce fungal issues. Healthy, well-sited hostas usually recover with few problems.
Best practices for long-term hosta success
Once your hosta is settled, the best care is simple: consistent moisture, adequate shade, and occasional division when clumps become crowded. Hostas often thrive for years in the same spot when the site suits them.
If you are moving them because they have outgrown their space, plan ahead for mature size. Give each division enough room to spread without crowding nearby plants.
Conclusion
If you are asking when is the best time to transplant hostas, aim for early spring or early fall and avoid stressful weather whenever possible. Prepare the new site, keep the roots moist, and plant at the same depth for the smoothest recovery.
For more help with shade gardens and perennial care, you may also want to read about how to divide perennials and growing hostas successfully.