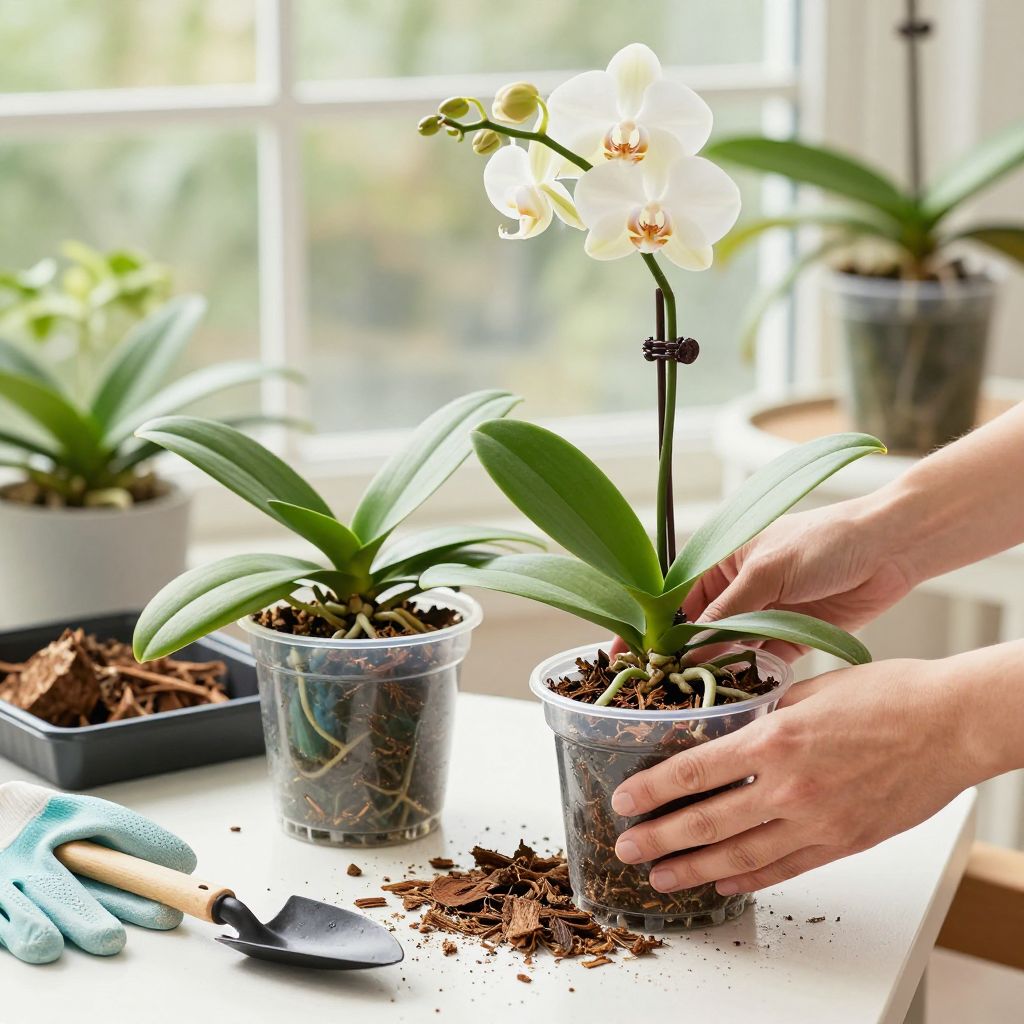
Wondering when to repot an orchid? The best time is usually just after flowering, when you see fresh root or leaf growth starting. That timing helps the plant recover quickly and settle into new bark or orchid mix before it has to support blooms again.
Repotting at the wrong time can interrupt flowering or stress roots, but waiting too long can leave the orchid cramped, waterlogged, or declining. With a few simple checks, you can tell when your orchid needs a new pot and do the job with less risk.
When to repot an orchid?
Repot most orchids right after blooming, or when new roots begin to grow. In general, every 1 to 2 years is a good rhythm for many houseplant orchids, especially Phalaenopsis. Repot sooner if the potting mix has broken down, the roots are crowded, or the plant stays too wet after watering.
How to tell your orchid needs repotting
Season matters, but the plant’s condition matters more. An orchid gives you clear signs when it has outgrown its pot or its mix is no longer healthy.
Common signs to look for
- Roots are circling, crowding, or climbing out of the pot.
- The potting mix looks dark, mushy, or smells sour.
- Water runs through too quickly, or the mix stays wet for days.
- The plant wobbles because the bark has broken down and no longer anchors it.
- Roots look brown, hollow, or papery instead of firm and plump.
- The orchid has not been repotted for 1 to 2 years, and growth has slowed.
A healthy orchid can often tolerate a snug pot, so do not repot just because roots are visible. Many orchids naturally grow with exposed aerial roots, especially Phalaenopsis.
When not to repot
Avoid repotting while the orchid is in full bloom unless there is a serious problem such as root rot, a broken pot, or badly decomposed mix. Repotting during flowering can cause buds or blooms to drop.
If the plant is already stressed from heat, cold, pests, or recent shipping, give it time to recover first unless the roots are failing.
Best seasonal timing for repotting orchids
For most indoor orchids, late winter through spring is ideal because light levels are improving and the plant is entering active growth. That gives the orchid time to establish new roots before the lower-light months return.
Spring
Spring is often the safest and most forgiving time to repot. Many orchids begin root and leaf growth then, which helps them recover faster after being moved into fresh mix.
Summer
Summer repotting can work if the orchid is actively growing and temperatures are moderate. In very hot weather, repot only if necessary and keep the plant out of harsh direct sun while it adjusts.
Autumn
Autumn is a less ideal time for many orchids because growth may slow as light decreases. If you must repot, do it early in the season so the plant has time to settle in before winter.
Winter
Winter is usually the least favorable time unless the orchid is rotting, severely rootbound, or the mix has completely failed. Low light and slower growth can make recovery take longer.
Choosing the right pot and potting mix
Orchids need excellent drainage and air around the roots. The right pot and mix matter as much as timing.
Pot choice
- Use a pot with plenty of drainage holes.
- Choose a pot only slightly larger than the root mass, usually just 1 to 2 inches wider if the plant needs more room.
- Clear plastic pots can help you monitor roots and moisture, especially for Phalaenopsis.
Potting mix
Most common houseplant orchids are not grown in regular potting soil. They usually need an airy orchid mix made from bark, sphagnum moss, perlite, charcoal, or similar coarse materials.
Never pack the mix tightly. Orchid roots need oxygen, and dense media can suffocate them and lead to rot.
How to repot an orchid step by step
Repotting is easier if you prepare everything first. Work gently, and do not force roots that are firmly attached to the old pot or bark unless they are dead.
- Water lightly a day before repotting if the plant is very dry. This can make roots more flexible.
- Remove the orchid from its pot and gently tease away old mix.
- Inspect the roots carefully.
- Trim only dead roots with clean scissors or pruners. Healthy roots are firm and usually green, silver, or white depending on moisture.
- Place the orchid in the new pot so the base sits at the same level as before.
- Fill around the roots with fresh orchid mix, tapping the pot lightly to settle it.
- Do not bury the crown or growing point.
- Water only enough to settle the mix if needed, then let excess drain freely.
Tools that help
- Clean scissors or pruning snips
- Fresh orchid bark or mix
- A pot with drainage holes
- Optional stakes or clips for tall flower spikes
- Gloves if you prefer to keep your hands clean
What to do after repotting
The first few weeks after repotting are about stability, not pushing growth. Keep conditions steady so the orchid can rebuild roots.
Aftercare basics
- Place the orchid in bright, indirect light.
- Keep it out of strong direct sun for a short recovery period.
- Water only when the mix is approaching dryness, not on a fixed schedule.
- Hold off on fertilizing for about 2 to 4 weeks, or until you see new growth resuming.
- Watch for wobbling; if needed, stake the plant gently so new roots can anchor it.
If your orchid was repotted from decomposed moss or soggy bark, it may need less water at first because the new mix drains more quickly. Always check moisture before watering again.
Common repotting mistakes to avoid
Most orchid problems after repotting come from too much moisture, too much damage to roots, or the wrong potting medium.
- Using regular potting soil. It holds too much water for most orchids.
- Repotting into a pot that is far too large.
- Cutting healthy roots by mistake.
- Watering heavily immediately after repotting when the roots are already stressed.
- Leaving old, broken-down mix packed around the roots.
- Repotting in the middle of bloom without a good reason.
Special notes for different orchid types
Not all orchids behave exactly the same, so adjust your timing to the plant you grow.
Phalaenopsis
These are the most common indoor orchids and are usually repotted after flowering, often every 1 to 2 years. They recover well when repotted as new roots begin to emerge.
Cattleya and similar orchids
These often prefer repotting when new roots are just starting from the newest growth. If you repot too late, the plant may take longer to anchor and establish.
Dendrobium
Timing depends on the type, but many are best repotted when new growth starts and before roots become too long and brittle. Avoid repotting during dormancy unless the mix has failed.
If you are unsure of the orchid type, use the plant’s growth pattern as your guide: repot when active growth begins, not when the plant is resting or blooming heavily.
How often should you repot?
Many orchids need repotting every 1 to 2 years, but the real answer depends on the mix, watering habits, and how fast the bark breaks down. Sphagnum moss may need replacing sooner than coarse bark in some homes.
Repot sooner if the mix has collapsed, because old media holds too much moisture and reduces airflow. Even a healthy-looking orchid can decline if the potting material has aged too far.
What about orchids growing outdoors?
Outdoor orchids should still be repotted during active growth, but local climate matters more. Choose a mild period with stable temperatures, and avoid repotting during extreme heat, cold snaps, heavy rain, or windy weather.
For outdoor-grown orchids, the new mix should dry at a rate that matches your conditions. In humid climates, you may need a coarser mix; in drier climates, a slightly more moisture-retentive mix may be appropriate.
Conclusion: the simplest rule to follow
If you want the easiest answer to when to repot an orchid, use this rule: repot after flowering, when new roots are starting and the potting mix is breaking down. That timing gives your orchid the best chance to recover quickly and grow strongly.
For more orchid care guidance, you may also want to read about how to water orchids correctly and choosing the best orchid potting mix.